Last February, I promised my daughter’s class I’d bring homemade treats for their Valentine’s party. With twenty kids expecting something special and only one evening to prepare, I needed a dessert that looked impressive but didn’t require professional pastry skills. Valentine’s Day Cake Pops became my lifesaver that night, and they’ve remained my go-to festive treat ever since.
These bite-sized beauties combine moist cake crumbs with creamy frosting, then get coated in colorful candy melts and decorated with festive sprinkles. Unlike traditional cakes that require frosting finesse, cake pops forgive minor imperfections while still looking absolutely adorable. Plus, kids love anything served on a stick.
The best part? You can make these Valentine’s Day Cake Pops using a simple boxed cake mix. No fancy baking techniques required. Just crumble, mix, roll, dip, and decorate. The whole process takes about 90 minutes from start to finish, including chilling time.
Why This Recipe Works
Boxed cake mix produces consistently moist cake every single time. When you crumble it and mix with frosting, you create a moldable dough that holds its shape perfectly. This technique eliminates the main challenge most people face when attempting cake pops: keeping them from falling apart.
Freezing the cake balls before dipping makes the coating process remarkably simple. Cold cake pops don’t crumble when you stick them, and the chilled surface helps the candy coating set quickly into a smooth shell. This prevents the dreaded thick, lumpy chocolate coating that ruins so many homemade cake pops.
Candy melts work better than regular chocolate for coating because they’re specifically formulated for dipping. They stay fluid longer, harden with a nice sheen, and come in every color imaginable. For Valentine’s Day, pink and white candy melts create that classic romantic look everyone expects.
Essential Ingredients
Gather these simple ingredients before you start. Most are probably already in your pantry.
- 1 box vanilla cake mix (Betty Crocker or Duncan Hines work great)
- Eggs, water, and oil as specified on the cake mix box
- ⅓ cup vanilla frosting (Betty Crocker Rich and Creamy recommended)
- ½ bag white candy melts (12 oz bag)
- ½ bag pink candy melts (12 oz bag)
- Heart-shaped sprinkles or Valentine’s themed decorations
- 28-30 lollipop sticks or cake pop sticks
The frosting acts as the binder that transforms crumbled cake into shapeable dough. Start with ⅓ cup and add more only if your mixture seems too dry. Too much frosting creates overly soft cake pops that won’t hold their shape.
Candy melts are sold in the baking aisle at most craft stores and supermarkets. Wilton and Ghirardelli make excellent versions. Avoid using chocolate chips, which contain stabilizers that prevent smooth melting.
Step-by-Step Instructions
Start by baking your cake according to package directions. Use a 9×13-inch pan or two 8-inch round pans. Either works perfectly fine. Bake until a toothpick inserted in the center comes out clean, then let the cake cool completely.
Once cooled, crumble the entire cake into a large mixing bowl. Use your hands or a fork to break it into fine crumbs. The finer your crumbs, the smoother your finished cake pops will be. Remove any dark edges or overly crispy bits that might create texture issues.
Add the frosting to your cake crumbs and mix thoroughly. Use a hand mixer, stand mixer, or just a sturdy spoon and some elbow grease. Mix until everything combines into a dough-like consistency. The mixture should stick together when pressed but not feel overly wet or greasy.
Cover the bowl with plastic wrap and freeze for 30-45 minutes. This initial chill makes rolling the balls much easier. Your hands won’t get as messy, and the balls will hold their shape better.
Shaping the Cake Balls
Use a cookie scoop or tablespoon to portion out even amounts of the cake mixture. Roll each portion between your palms to create smooth balls about the size of ping pong balls. Uniformly sized balls ensure even coating and professional-looking results.
Place the rolled balls on a parchment-lined baking sheet. Make sure they’re not touching each other. Once you’ve rolled all the balls, freeze them again for at least 30 minutes or until they’re completely firm.
This second freeze is crucial. Rock-hard cake balls won’t crumble when you insert the sticks. They’ll also cause the melted candy coating to set immediately on contact, creating that perfect thin shell.
Dipping and Decorating
Melt your candy melts according to package instructions. Microwave in 30-second bursts, stirring between each interval. The candy should be completely smooth and pourable. If it seems too thick, add a teaspoon of coconut oil or vegetable shortening to thin it slightly.
Remove the frozen cake balls from the freezer. Dip the tip of a lollipop stick about half an inch into the melted candy, then immediately insert it into a cake ball. Push it in about halfway. The candy acts like glue, securing the stick to the ball.
Repeat this process with all the cake balls. Place them back in the freezer for 10-15 minutes until the candy at the base solidifies completely. This prevents the balls from sliding off the sticks during the coating process.
Now comes the fun part. Hold a cake pop by its stick and dip it straight down into the melted candy. Rotate it gently to coat all sides. Lift it out and hold it over the bowl, tapping the stick lightly against the edge to remove excess coating.
While the coating is still wet, add your sprinkles immediately. The candy coating sets quickly, so you only have a few seconds. Place the decorated cake pop upright in a styrofoam block, cardboard box with holes, or cake pop stand.
Let the coating set completely at room temperature for about 15 minutes. Don’t rush this step by refrigerating, or you’ll risk condensation forming on the surface.
Pro Tips for Perfect Results
- Use a tall, narrow container for melting candy melts to make dipping easier
- Keep cake balls cold right up until dipping to prevent cracking
- Tap off excess coating gently but thoroughly for a thin, professional finish
- Work with 4-5 cake pops at a time so the coating doesn’t harden mid-process
- Reheat candy melts as needed to maintain smooth, dipping consistency
- Add decorations immediately after dipping while coating is still wet
Creative Decoration Ideas
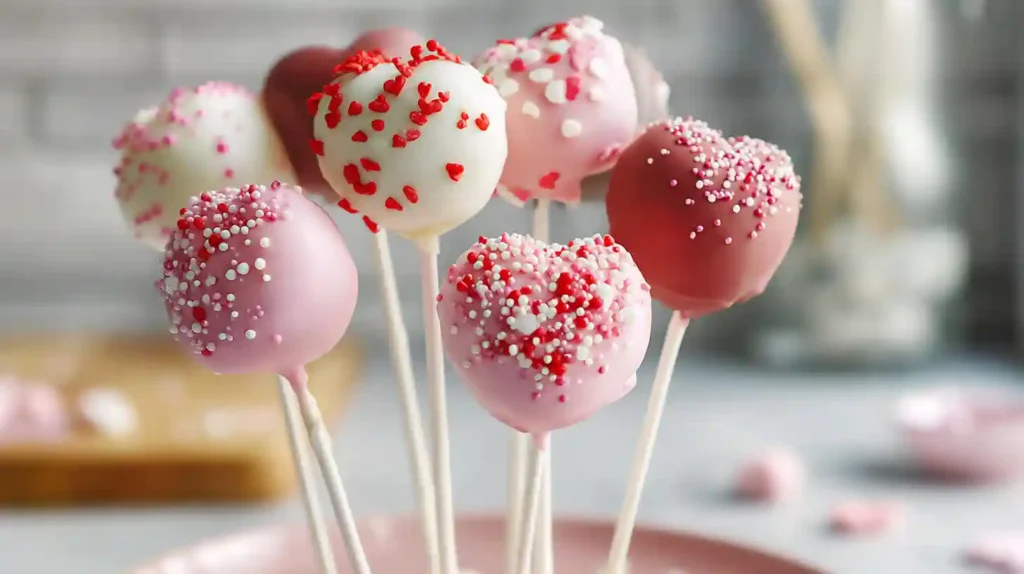
Basic heart sprinkles work beautifully, but you can get creative with your decorations. Drizzle contrasting colored candy melts over the base coat for a fancy striped effect. Use edible glitter or pearl dust for sparkly, elegant cake pops perfect for adult celebrations.
Try dipping some cake pops in white candy melts and others in pink for visual variety. Mix and match sprinkle colors too. Red, pink, and white combinations create that classic Valentine’s aesthetic everyone recognizes instantly.
For an extra special touch, pipe tiny hearts or “XOXO” messages using melted candy in a piping bag. Let the base coat harden first, then add these details. They take a bit more time but look absolutely stunning.
Flavor Variations
Vanilla cake provides a neutral base that pairs with any frosting flavor. Try cream cheese frosting instead of vanilla for tangier cake pops with a slight richness. Chocolate frosting with vanilla cake creates cookies-and-cream vibes.
Red velvet cake mix with cream cheese frosting makes classic Valentine’s-themed cake pops with authentic color throughout. Strawberry cake mix gives you naturally pink cake pops before you even add the coating.
For chocolate lovers, use chocolate cake mix with chocolate frosting and coat in dark chocolate candy melts. Add white chocolate drizzle for contrast. These darker cake pops look sophisticated and appeal to adults.
Storage and Serving
Store finished cake pops at room temperature in an airtight container for up to 3-4 days. Stack them carefully with parchment paper between layers to prevent scratching the coating. Keep them away from heat sources that might melt the candy coating.
Refrigeration works for longer storage but can cause condensation when you bring them back to room temperature. If you must refrigerate, let them come to room temperature gradually before unwrapping to minimize moisture issues.
For gifting, wrap individual cake pops in clear cellophane bags tied with ribbon. Package them upright in small boxes or arrange several in a decorative container. They make gorgeous edible gifts that look like they came from a fancy bakery.
Serve cake pops upright in a display stand for parties. Styrofoam blocks covered in decorative paper work perfectly. Arrange them by color for maximum visual impact on your dessert table.
Troubleshooting Common Problems
Cake pops falling off sticks means your balls weren’t frozen solid enough before dipping. Always freeze until completely hard. The candy coating “glue” on the stick needs something cold to grab onto.
Cracked candy coating happens when you dip cake balls that are too warm. The temperature difference causes the coating to contract and crack. Keep balls frozen until the moment you’re ready to dip each one.
Lumpy, thick coating results from candy melts that are too thick or cake balls that are too warm. Thin your candy slightly with coconut oil. Make sure balls are frozen solid before dipping.
Cake mixture too dry and crumbly needs more frosting. Add it one tablespoon at a time until the mixture holds together when pressed. Too wet and sticky means you added too much frosting. You can’t really fix this, so measure carefully from the start.
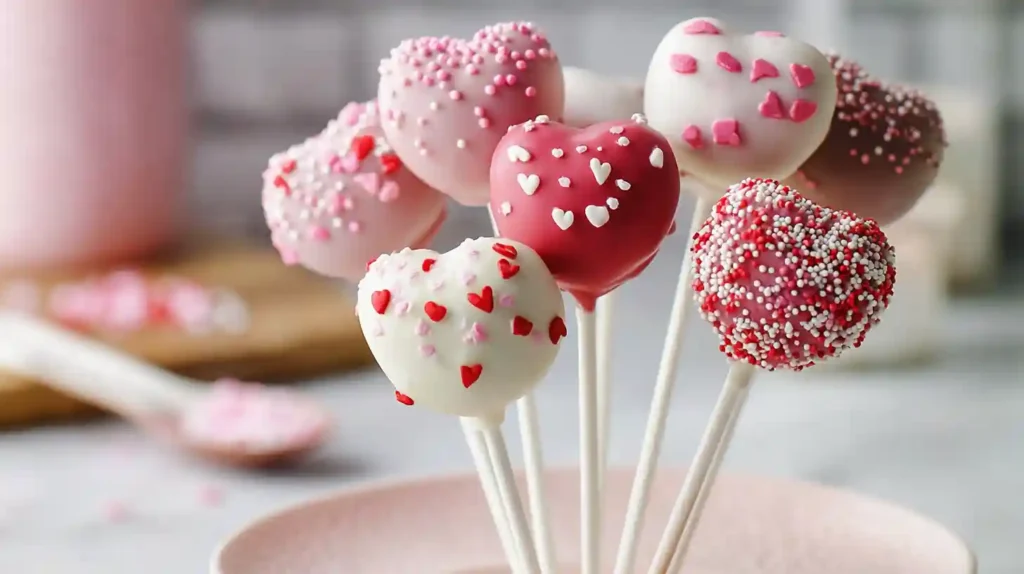
Making Them Heart-Shaped
Turn regular round cake pops into adorable hearts with a simple shaping technique. After rolling your cake mixture into balls, gently form each ball into a teardrop shape with one pointed end.
Use your pinkie finger or the back of a small spoon to press an indent into the rounded top. This creates the classic heart shape with two curves at the top and a point at the bottom. Keep the cake at least 1 inch thick so you can insert the stick securely.
Freeze heart-shaped cake pops on a flat tray so they don’t roll and lose their shape. When inserting sticks, push them into the bottom pointed end for best stability. These heart-shaped versions require a bit more effort but look absolutely precious.
FAQ
Can I make these ahead of time?
Absolutely. Undecorated cake balls freeze beautifully for up to three months. Thaw them in the refrigerator overnight, then bring to room temperature before dipping and decorating.
What if I don’t have lollipop sticks?
Skip the sticks entirely and make cake balls instead. Just dip them using a fork or dipping tool, then place on parchment paper to set. They taste exactly the same without sticks.
Can I use homemade cake instead of boxed mix?
Yes, homemade cake works perfectly. Use any basic vanilla or chocolate cake recipe. The key is making sure the cake is completely cooled before crumbling.
Why did my candy coating seize up?
Even a tiny drop of water causes candy melts to seize into a grainy mess. Make sure all your bowls and utensils are completely dry. Never cover candy melts while melting, as condensation from the lid can drip in.
How do I transport cake pops without ruining them?
Stand them upright in styrofoam blocks inside a covered container. The sticks should be secure enough that they won’t tip over. Avoid laying them flat, which scratches the coating.
Can I use regular chocolate instead of candy melts?
You can, but temper it properly for best results. Untempered chocolate won’t set with the same sheen and might bloom. Candy melts are specifically designed for easy dipping without tempering.
How thick should the candy coating be?
Aim for a thin, even coating that just covers the cake ball. Thick coatings look amateurish and overwhelm the cake flavor. Proper tapping removes excess coating for that professional finish.

Valentine’s Day Cake Pops Recipe
Ingredients
Equipment
Method
- Prepare cake batter according to package directions. Beat cake mix with eggs, water, and vegetable oil in a large mixing bowl as specified on the box.
- Pour batter into a greased 9×13-inch baking dish or two 8-inch round cake pans. Bake in a preheated 350°F oven until a toothpick inserted into the center comes out clean, about 25 minutes. Let cake cool completely.
- Once cooled, crumble the entire cake into fine crumbs using your hands or a fork in a large bowl. Remove any dark edges or overly crispy pieces.
- Add ⅓ cup frosting to the crumbled cake. Mix thoroughly with a hand mixer, stand mixer, or spoon until combined into a dough-like consistency that sticks together when pressed.
- Cover bowl with plastic wrap and freeze for 30-45 minutes until mixture is chilled and easier to work with.
- Use a cookie scoop and your hands to roll the mixture into evenly sized balls about the size of ping pong balls. Place on a parchment-lined baking sheet, ensuring they don’t touch.
- Freeze again for 30 minutes or until balls are completely hard. This second freeze is crucial for preventing cracking and crumbling.
- Melt candy melts in the microwave in 30-second intervals, stirring between each burst, until completely smooth. Use separate bowls for pink and white candy melts.
- Remove frozen cake balls from freezer. Dip the tip of a lollipop stick about ½ inch into melted candy, then immediately insert into a cake ball, pushing halfway through. Repeat with all balls.
- Place cake pops back in freezer for 10-15 minutes until the candy at the base solidifies completely.
- Holding the stick, gently dip each cake pop straight down into melted candy coating. Rotate to coat all sides, then lift and tap the stick lightly against the bowl edge to remove excess coating.
- While coating is still wet, immediately add heart sprinkles or decorations. Place cake pops upright in a styrofoam block or cake pop stand.
- Let coating set at room temperature for 15 minutes until completely hardened. Your Valentine’s Day Cake Pops are ready to serve or gift!
Notes
- Frosting amount: Start with ⅓ cup and add more only if mixture is too dry. Too much frosting creates overly soft cake pops.
- Freezing is key: Rock-hard frozen cake balls prevent cracking and falling off sticks during dipping.
- Thin coating: Tap off excess candy coating for professional-looking thin shells.
- Storage: Store in airtight container at room temperature for 3-4 days. Undecorated cake balls freeze for up to 3 months.
- Heart shapes: Form balls into teardrop shape and press indent at top with pinkie finger before freezing.