The first time I attempted red velvet brownies, I ended up with something that looked more like crimson cake than proper brownies. They were fluffy when I wanted fudgy. Sweet when I wanted that subtle tang. The color was there, but everything else felt wrong. I had assumed red velvet brownies were just chocolate brownies with food coloring, which turned out to be a massive misunderstanding of what makes red velvet special. After multiple failed batches and some research into the chemistry of red velvet, I finally understood. Red velvet is not chocolate cake with red dye. It is its own thing, built on a delicate balance of cocoa, acid, and specific techniques that create a texture unlike anything else. The cocoa should be subtle, not overpowering. The vinegar is not optional because it reacts with the other ingredients to create that signature tenderness. The batter needs to be whisked in a specific way to develop the right crumb. Once I got those fundamentals right, these Red Velvet Brownies became exactly what they should be: dense and fudgy like a brownie, but with that unmistakable red velvet flavor and a cream cheese frosting that cuts through the richness perfectly. They taste like Valentine’s Day and Christmas and celebration, all wrapped up in one decadent square.
Understanding Red Velvet Brownies
Red velvet brownies sit in an interesting space between traditional chocolate brownies and red velvet cake[file:31]. They use less cocoa powder than chocolate brownies, which allows the red color to shine through and prevents them from tasting too intensely chocolatey. The addition of white vinegar is crucial. It does not make the brownies taste sour. Instead, it reacts with the cocoa powder to bring out a reddish tint naturally and creates a tender, velvety crumb. This acid also interacts with the other ingredients to produce that characteristic red velvet taste that people recognize instantly.
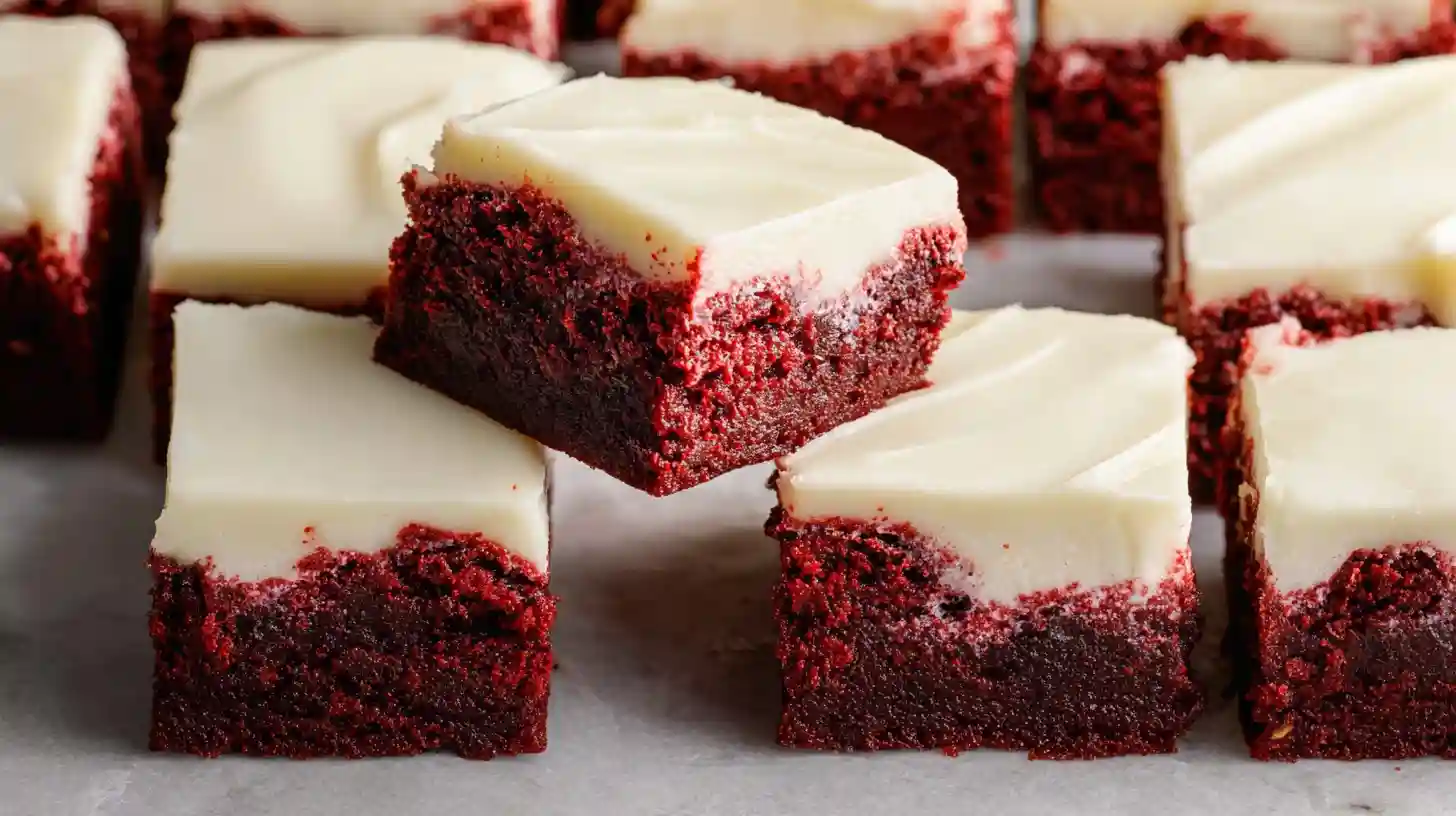
The texture of these brownies is denser than cake but not as heavy as fudge brownies[file:31]. They should be chewy on the edges with a soft, almost custardy center. The cream cheese frosting is not just decoration. It provides the tangy contrast that makes red velvet complete. Without it, these would just be slightly odd chocolate brownies. Together, the brownie base and frosting create that classic red velvet experience. The whole thing comes together in one bowl without a mixer, making it surprisingly simple for something that looks and tastes this impressive.
Gathering Your Ingredients
For the brownies themselves, you need half a cup of unsalted butter, which can be regular or dairy-free[file:31]. One cup of granulated sugar and half a cup of packed light brown sugar provide sweetness and contribute to that fudgy texture. You will need two large eggs to bind everything together. One tablespoon of white vinegar is essential for that red velvet character. Two teaspoons of vanilla extract add depth. For color, use one to two tablespoons of red food coloring, either liquid or gel. The amount depends on how vibrant you want the color and how intense your particular brand of food coloring is.
The dry ingredients include two tablespoons of unsweetened cocoa powder, not Dutch-processed[file:31]. Quarter teaspoon of salt balances the sweetness. One and one-quarter cups of all-purpose flour create the structure. For the cream cheese frosting, you need eight ounces of cream cheese at room temperature, which can also be dairy-free if needed. Four tablespoons of softened butter, whether regular or dairy-free. One teaspoon of vanilla extract. A pinch of salt. Two to three cups of powdered sugar, depending on how thick you want the frosting. If using dairy-free cream cheese, add one tablespoon of cornstarch or tapioca starch to help thicken the frosting since dairy-free versions tend to be looser.
Making the Brownie Base
Preheat your oven to 350 degrees Fahrenheit[file:31]. Line an eight-by-eight inch square baking pan with parchment paper, leaving some hanging over the sides so you can lift the brownies out later. This makes cutting them much easier. Melt the butter in a microwave-safe bowl or in a small pan on the stove. Let it cool for a minute so it does not cook the eggs when you add them.
Pour the melted butter into a medium bowl[file:31]. Add both the granulated sugar and the brown sugar. Using a whisk, mix them together vigorously. Keep whisking for a full two to three minutes. You want the mixture to become thick and paste-like, pulling away cleanly from the sides of the bowl when you stir. This step aerates the mixture and helps create that fudgy texture. Do not skip it or rush it.

Add the eggs, white vinegar, vanilla extract, and red food coloring to the bowl[file:31]. Whisk everything together until the mixture is smooth and uniform in color. If the red is not as vibrant as you want, add a few more drops of food coloring. Different brands have different intensities, so adjust to your preference. The batter should look bright and glossy at this point.
Add the cocoa powder, salt, and flour directly to the wet ingredients[file:31]. Switch to a gentler mixing motion. Whisk just until you stop seeing streaks of flour, about one minute maximum. Overmixing at this stage will make the brownies tough instead of tender. The batter will be thick and rich, darker than you might expect but still distinctly red. Use a spatula to scrape the batter into your prepared pan, spreading it evenly into the corners.
Baking to Perfection
Bake the brownies for thirty to forty minutes[file:31]. Start checking at the thirty-minute mark. The exact time depends on your oven and whether you are using a glass or metal pan. Glass takes longer because it does not conduct heat as efficiently. You are looking for specific visual cues. The top should be crinkly and set, no longer shiny or wet-looking. The edges should pull away slightly from the sides of the pan.
Insert a toothpick into the center of the brownies[file:31]. It should come out with a few moist crumbs clinging to it, but not wet batter. This is crucial. If the toothpick comes out completely clean, you have overbaked them and they will be dry and cakey instead of fudgy. If it comes out with wet batter, give them another five minutes and check again. The brownies will continue cooking slightly as they cool, so you want to pull them out when they are just barely done.
Let the brownies cool completely in the pan on a wire rack[file:31]. This takes at least an hour, possibly longer. Do not try to frost warm brownies. The heat will melt the frosting and you will end up with a mess. If you are in a hurry, you can place the pan in the refrigerator after they have cooled to room temperature for about thirty minutes.
Making Cream Cheese Frosting
Make the frosting while the brownies cool[file:31]. Place the room-temperature cream cheese, softened butter, vanilla extract, and salt in a medium bowl. If you have a handheld electric mixer or a stand mixer, use it. If not, a wooden spoon and some elbow grease will work, though it takes longer. Beat everything together until smooth and creamy with no lumps. This takes about two minutes with a mixer, five or more by hand.
Add the powdered sugar gradually, about half a cup at a time[file:31]. Beat after each addition until incorporated. Start with two cups and check the consistency. The frosting should be thick enough to spread without running off the brownies, but not so stiff that it tears the brownie surface when you apply it. If it feels too thin, add more powdered sugar. If it is too thick, add a teaspoon of milk or cream and beat again. If you are using dairy-free cream cheese, add the tablespoon of cornstarch or tapioca starch with the first addition of powdered sugar. This helps it set properly.
Once the frosting reaches the right consistency, cover the bowl and refrigerate it until the brownies are completely cool[file:31]. Cold frosting spreads more easily and creates cleaner lines. When you are ready to frost, let it sit at room temperature for five minutes if it has become too firm to spread easily. Use an offset spatula or the back of a spoon to spread the frosting evenly over the cooled brownies. You can make it smooth and neat or leave swoops and swirls for a rustic look.
Tips for Success
- Use room temperature eggs and butter for easier mixing and better texture[file:31].
- Do not skip the whisking step with the butter and sugars. This creates the fudgy texture you want.
- White vinegar is essential. It reacts with the cocoa to develop that red velvet flavor[file:31].
- Do not overbake. Slightly underdone is better than overdone with brownies[file:31].
- Let the brownies cool completely before frosting or the frosting will melt[file:31].
Common Mistakes to Avoid
The most common mistake is overbaking these brownies[file:31]. Because they are red, you cannot judge doneness by color the way you can with chocolate brownies. You have to rely on the toothpick test and the texture of the top. Pull them out when they still seem slightly underdone in the center. They will firm up as they cool. Another mistake is using Dutch-processed cocoa instead of natural cocoa. Dutch-processed cocoa has been treated with alkali, which neutralizes its acidity. You need that acidity to react with the vinegar and create the red velvet character.
Many people skip the vinegar, thinking it is optional or that it will make the brownies taste weird[file:31]. It does neither. The vinegar is what makes these red velvet instead of just chocolate brownies with food coloring. Without it, the taste is flat and one-dimensional. Using cold cream cheese for the frosting is another common issue. Cold cream cheese will not blend smoothly and you will end up with lumps. Let both the cream cheese and butter sit at room temperature for at least an hour before making the frosting. Finally, if you are using a glass pan, adjust your expectations on baking time. Glass takes significantly longer than metal, sometimes up to ten minutes more.
Variations to Try
Once you have the basic recipe down, there are several ways to customize these brownies[file:31]. For a dairy-free version, simply substitute dairy-free butter and dairy-free cream cheese. The texture and flavor remain excellent. Just remember to add that tablespoon of cornstarch to the frosting to help it set. You can make these in a nine-by-thirteen inch pan for thinner brownies. Double all the ingredients and bake for twenty to thirty-five minutes, checking at the twenty-minute mark.
For added richness, fold in half a cup of white chocolate chips into the batter before baking[file:31]. They melt slightly and create pockets of sweetness throughout. You can also add cream cheese swirls directly into the brownie batter before baking. Reserve about a third of the cream cheese frosting, dollop it over the unbaked batter, and use a knife to swirl it through. This creates a marbled effect and adds tang throughout instead of just on top.
Storing and Serving
Store frosted red velvet brownies in an airtight container in the refrigerator[file:31]. The cream cheese frosting must be kept cold or it will spoil. They will stay fresh for four to five days. Let them come to room temperature for about fifteen minutes before serving for the best texture and flavor. Cold brownies are too firm and you lose some of the fudgy quality.
You can make these brownies ahead of time[file:31]. Bake the brownie base and let it cool completely. Store it unfrosted in an airtight container at room temperature for up to two days, or wrapped tightly and frozen for up to three months. Make the frosting and store it separately in the refrigerator for up to a week. When you are ready to serve, bring both components to room temperature and frost the brownies. This makes them perfect for holidays and parties when you want to spread out the work.
Why This Recipe Works
This recipe works because it respects the unique chemistry of red velvet while adapting it to a brownie format[file:31]. The reduced cocoa powder allows the red color to show through without compromising flavor. The vinegar creates both taste and texture through its reaction with the other ingredients. The whisking method aerates the batter without requiring a mixer, making these accessible even if you do not have fancy equipment. The cream cheese frosting provides the essential tangy contrast that defines red velvet desserts.
The ratio of wet to dry ingredients creates brownies that are dense and fudgy but not heavy[file:31]. The combination of granulated and brown sugar provides both sweetness and moisture. The eggs bind everything while contributing to the rich, custard-like interior. Every element serves a specific purpose, from the butter that adds richness to the salt that enhances all the other flavors. Make these once and you will understand why red velvet has endured as a classic flavor combination. These brownies deliver everything people love about red velvet in a format that is easier to make and serve than layer cake.
Frequently Asked Questions
Why is it taking longer for my brownies to bake?
If you are using a glass baking dish instead of metal, it will take longer to bake[file:31]. Glass does not conduct heat as efficiently as aluminum. Continue baking until the top is crinkly and a toothpick comes out with moist crumbs, not wet batter. This may take up to ten minutes longer than the recipe states.
Can I make these brownies ahead of time?
Yes, both the brownies and the frosting can be made ahead[file:31]. Store the unfrosted brownies at room temperature for up to two days or freeze them for up to three months. Store the frosting in the refrigerator for up to a week. Frost the brownies when you are ready to serve them.
Can I make this in a 9×13 pan?
Yes, double all the ingredients and bake in a nine-by-thirteen inch pan[file:31]. The baking time will be shorter, about twenty to thirty-five minutes. Check at twenty minutes and continue baking until a toothpick comes out with moist crumbs.
What if I do not have white vinegar?
White vinegar is essential for the red velvet flavor[file:31]. You can substitute apple cider vinegar in a pinch, though it will add a slight apple taste. Do not use balsamic or other flavored vinegars. If you absolutely cannot use vinegar, substitute fresh lemon juice, though the flavor will be slightly different.
Why are my brownies cakey instead of fudgy?
You probably overbaked them[file:31]. Red velvet brownies should come out of the oven when a toothpick still has moist crumbs on it. They continue cooking as they cool. Baking until the toothpick comes out completely clean will result in dry, cakey brownies instead of fudgy ones.
Can I use natural red food coloring?
Yes, though the color will be less vibrant[file:31]. Natural red food colorings made from beets or other vegetables tend to produce more brownish-red or burgundy tones rather than the bright red you get from artificial coloring. The taste and texture will be the same, just the color will be different.
How do I know when the brownies are done?
The top should be crinkly and set, and a toothpick inserted in the center should come out with moist crumbs but not wet batter[file:31]. The edges should pull away slightly from the pan. Start checking at thirty minutes and continue baking in five-minute increments if needed.
Red Velvet Brownies
Ingredients
Equipment
Method
- Prepare Pan: Preheat oven to 350°F (175°C). Line an 8×8 inch square baking pan with parchment paper, leaving some hanging over the sides.
- Melt Butter: Melt the butter in microwave or on stovetop. Let cool for 1 minute, then transfer to a medium bowl.
- Mix Sugars: Add granulated sugar and brown sugar to the butter. Whisk vigorously for 2 to 3 minutes until mixture is thick and paste-like, pulling away from sides of bowl.
- Add Wet Ingredients: Add eggs, white vinegar, vanilla extract, and red food coloring. Whisk until smooth and uniform in color. Add more food coloring if desired.
- Add Dry Ingredients: Add cocoa powder, salt, and flour to the bowl. Whisk gently just until combined, about 1 minute. Do not overmix.
- Bake: Pour batter into prepared pan and spread evenly. Bake for 30 to 40 minutes. Check at 30 minutes by inserting a toothpick in the center. Top should be crinkly and toothpick should come out with moist crumbs, not wet batter.
- Cool Completely: Let brownies cool completely in pan on a wire rack, at least 1 hour.
- Make Frosting: In a medium bowl with electric mixer, beat cream cheese, butter, vanilla, and salt until smooth, about 2 minutes.
- Add Sugar: Add powdered sugar gradually, about 1/2 cup at a time, beating after each addition. Start with 2 cups and add more for desired consistency. If using dairy-free cream cheese, add cornstarch with first addition of sugar.
- Chill Frosting: Cover and refrigerate frosting until brownies are completely cool.
- Frost and Serve: Spread frosting evenly over cooled brownies using offset spatula or back of spoon. Cut into 16 squares and serve.