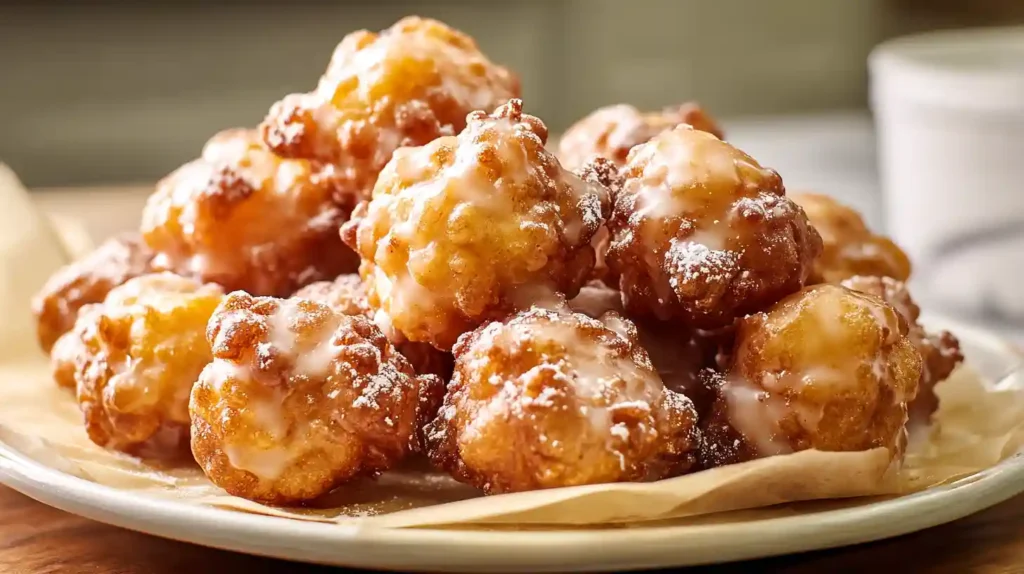
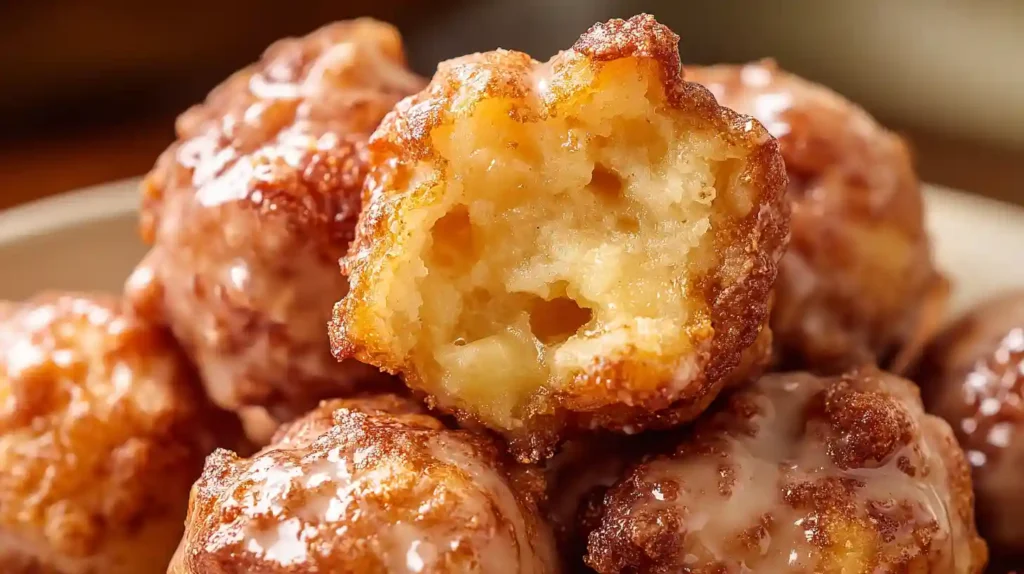
The first autumn I made these Apple Fritter Bites, I set them on the kitchen counter to cool and turned around for literally two minutes to start washing dishes, only to discover my family had already devoured half the batch while I had my back turned. These little bites of heaven capture everything you love about classic apple fritters the soft, doughy interior studded with tender apple chunks, the warm cinnamon spice, and that irresistible crackly glaze but in adorable, poppable form that makes them impossible to resist.
The genius of this recipe lies in baking the fritters instead of deep frying them, which not only makes them healthier but also eliminates the intimidating process of working with hot oil and ensures consistent results every single time. Each bite delivers a pillowy soft texture thanks to the combination of melted butter, applesauce, and fresh diced apples that keep the batter incredibly moist. The apple cider glaze is what truly elevates these from good to absolutely spectacular, bringing a tart sweetness that gets brushed on twice—once before broiling to create that signature caramelized, crackly crust, and again after broiling to add extra shine and flavor. That brief moment under the broiler transforms the glaze into something magical, creating pockets of bubbling, caramelized sugar that hardens into a delicate shell with the most satisfying crunch when you bite through it.
The batter comes together in just one bowl in under 15 minutes of prep time, making these surprisingly easy for how impressive they look and taste. Fresh Honeycrisp or Gala apples work best because their natural sweetness and firm texture hold up beautifully during baking without turning mushy. These bites are perfect for fall gatherings, holiday brunches, tailgating, or simply as a weekend treat when you want something special but do not want to spend hours in the kitchen. Kids go absolutely bonkers for these because they are bite-sized and fun to eat, while adults appreciate the sophisticated balance of sweet and tart flavors.
You can make these year-round using any crisp, sweet apple variety, though they truly shine in autumn when fresh apple cider is readily available and the air turns crisp enough to make you crave warm spices. Whether you serve them fresh from the oven while still warm or at room temperature after the glaze has fully set, these Apple Fritter Bites will become your new favorite way to celebrate apple season.
Why Baked Apple Fritters Work Better
Baking these fritters instead of frying eliminates the mess and uncertainty of working with hot oil while producing more consistent results across the entire batch. Every fritter bakes evenly in the oven, whereas frying often results in some pieces being overcooked while others remain underdone. The baking method also allows you to make larger batches at once since you can fit 15 to 20 bites on a single baking sheet rather than frying in small batches.
Using unsweetened applesauce in the batter serves multiple purposes it adds moisture, contributes apple flavor from the inside out, and allows you to use less butter while maintaining a tender crumb. The applesauce also helps bind the batter together, creating structure that holds up well during baking. Fresh diced apples folded into the batter ensure you get actual fruit in every single bite rather than just apple-flavored dough.
The two-stage glazing technique creates layers of flavor and texture that single-glazed fritters simply cannot match. Brushing glaze on before broiling allows it to caramelize and bubble, forming that iconic crackly exterior. Adding a second coat after broiling creates shine and intensifies the apple cider flavor while the residual heat helps the glaze soak in slightly for deeper taste throughout.
Ingredients for Apple Fritter Bites
Fritter Batter
- Nonstick cooking spray for greasing
- 1 1/2 cups all-purpose flour
- 2 teaspoons baking powder
- 1/2 teaspoon kosher salt
- 2 teaspoons ground cinnamon
- 1/4 cup unsalted butter, melted
- 1/4 cup granulated sugar
- 1 large egg
- 1/2 teaspoon vanilla extract
- 1/2 cup unsweetened applesauce
- 1 1/2 cups finely diced Honeycrisp or Gala apples, about 2 medium
Apple Cider Glaze
- 2 cups powdered sugar
- 1/3 cup plus 2 tablespoons apple cider or apple juice
How to Make Apple Fritter Bites
Preheat your oven to 400 degrees Fahrenheit and position the rack in the center for even heat distribution. Grease a large baking sheet thoroughly with nonstick cooking spray, making sure to coat the entire surface so the fritters release easily after baking. Set the prepared sheet aside while you make the batter.
In a medium mixing bowl, whisk together 1 1/2 cups flour, 2 teaspoons baking powder, 1/2 teaspoon salt, and 2 teaspoons cinnamon until the dry ingredients are evenly distributed with no clumps of baking powder or cinnamon remaining. The thorough whisking ensures even rise and consistent cinnamon flavor throughout every bite.
In a large mixing bowl, whisk the melted butter and granulated sugar together until well combined and slightly thickened, about 30 seconds. Add the egg, vanilla extract, and applesauce, whisking vigorously until the mixture is smooth and unified with no streaks of egg visible. The mixture should look pale and somewhat fluffy after whisking.
Add the dry ingredients to the wet ingredients all at once, then stir gently with a rubber spatula just until the flour disappears and you have a thick, somewhat lumpy batter. Do not overmix or beat the batter, as this develops gluten and makes the fritters tough instead of tender. A few small lumps are perfectly fine and will disappear during baking.
Gently fold the finely diced apples into the batter using broad, sweeping motions with your spatula until the apple pieces are evenly distributed throughout. Make sure your apples are diced very finely, about 1/4-inch cubes, so you get plenty of apple in each small bite without overwhelming the delicate batter structure.
Using a tablespoon or small cookie scoop, drop rounded tablespoon-sized portions of batter onto the prepared baking sheet, spacing them about 2 inches apart to allow for spreading. You should get approximately 30 bites from this batch. The batter will be quite thick and chunky with apple pieces, which is exactly what you want.
Bake the fritter bites for 10 minutes, until they are puffed up, set around the edges, and just beginning to turn golden on the bottoms. Remove the baking sheet from the oven and immediately turn on your broiler to high heat while you prepare the glaze. The fritters should still be quite pale on top at this point.
Make the apple cider glaze by whisking together 2 cups powdered sugar with 1/3 cup plus 2 tablespoons apple cider or apple juice in a medium bowl until completely smooth and thin enough to drip easily from a spoon. The glaze should have the consistency of heavy cream—add another tablespoon of cider if it seems too thick.
Using a pastry brush, generously brush about half of the glaze over the tops of the warm fritter bites, allowing the glaze to drip down the sides. Work quickly while the fritters are still warm so the glaze adheres properly. Place the glazed fritters under the preheated broiler for 2 to 4 minutes, rotating the pan every minute or so, until the glaze starts bubbling vigorously and caramelizing into a golden color with darker spots.
Remove the baking sheet from under the broiler and immediately brush the remaining glaze evenly over the tops of all the fritters, covering any spots that look dry. The residual heat will help this second layer of glaze melt slightly and soak in. Let the glazed fritter bites sit on the baking sheet for 15 minutes to allow the glaze to set and develop that signature crackly texture before serving.
Expert Tips for Perfect Results
- Dice apples very finely into uniform 1/4-inch pieces so you get apple in every bite without large chunks that make portions uneven.
- Do not overmix the batter after adding flour—stir just until combined and stop even if you see small lumps remaining.
- Use fresh apple cider rather than apple juice for the glaze when possible, as it provides deeper, more complex apple flavor.
- Watch the fritters closely under the broiler and rotate the pan frequently to prevent burning—broilers vary dramatically in intensity.
- Make sure the glaze is thin and pourable before brushing it on, as thick glaze will not spread smoothly or caramelize properly.
- Let glazed fritters sit for the full 15 minutes so the glaze can set completely into that desirable crackly coating.
- Measure flour properly by spooning it into measuring cups and leveling off, never packing or scooping directly from the bag.
- Melt butter and let it cool slightly before adding to prevent it from cooking the egg when you mix them together.
Delicious Variations to Try
- Add 1/4 teaspoon ground nutmeg or cardamom to the dry ingredients for extra warmth and spice complexity.
- Mix 1/2 cup chopped pecans or walnuts into the batter along with the apples for nutty crunch and flavor.
- Use pear cider and diced pears instead of apple cider and apples for a sophisticated pear fritter variation.
- Add 1/2 teaspoon maple extract to the batter and drizzle finished fritters with maple syrup for maple apple fritters.
- Fold 1/4 cup caramel chips into the batter for pockets of melted caramel throughout the fritters.
- Make a chai-spiced version by replacing cinnamon with 2 teaspoons chai spice blend for warming complexity.
- Sprinkle coarse sanding sugar over the final glaze layer for extra sparkle and crunch at parties or special occasions.
- Drizzle finished fritters with salted caramel sauce in addition to the cider glaze for extreme indulgence.
Apple Selection and Preparation
Honeycrisp apples work exceptionally well in this recipe because they maintain their structure during baking while providing sweet-tart flavor and satisfying crunch. Gala apples are another excellent choice, offering consistent sweetness and firm texture that holds up well to heat. Fuji apples make a sweeter alternative if you prefer less tartness, while Granny Smith provides maximum tartness for those who like pronounced apple flavor.
Avoid soft apple varieties like Red Delicious or McIntosh, as they turn mushy during baking and release too much liquid that can make the fritters soggy. The apples should be fresh and crisp when you dice them—older apples that have become mealy will not provide the texture contrast you want in the finished fritters.
Dice the apples very finely and uniformly, aiming for pieces no larger than 1/4 inch on any side. Larger chunks create uneven texture and make it difficult to scoop uniform portions of batter. Peel the apples if you prefer, though leaving the skin on adds nutritional value, color flecks, and does not negatively impact texture since the pieces are so small.
Toss diced apples with a squeeze of lemon juice if you are not using them immediately to prevent browning. Drain off any accumulated liquid before folding them into the batter, as excess moisture can make the fritters spread too much during baking or create gummy spots in the finished texture.
Storage and Make-Ahead Tips
Store leftover Apple Fritter Bites in an airtight container at room temperature for up to 2 days. The glaze will soften slightly after the first day but the fritters remain delicious. For longer storage, refrigerate in an airtight container for up to 5 days, though the texture is best when brought to room temperature before eating.
These fritters freeze well for up to 2 months when stored properly. Let them cool completely after glazing, then freeze in a single layer on a baking sheet until solid. Transfer frozen fritters to a freezer-safe container or bag, separating layers with parchment paper to prevent sticking. Thaw overnight in the refrigerator or at room temperature for 1 to 2 hours before serving.
For best results with make-ahead preparation, you can mix the dry ingredients up to 1 week in advance and store in an airtight container. The wet ingredients and apples should be mixed fresh on baking day for optimal texture and flavor. You can dice apples up to 4 hours ahead if tossed with lemon juice and refrigerated in an airtight container.
Reheat room temperature or refrigerated fritters in a 300-degree Fahrenheit oven for 5 minutes to refresh them and restore some of the glaze crackle. Do not microwave glazed fritters as this makes the glaze sticky and ruins the texture. Frozen fritters can go directly from freezer to a 325-degree oven for 10 to 12 minutes until warmed through.
Troubleshooting Common Issues
- Fritters are dense and tough: Batter was overmixed, developing too much gluten. Mix only until flour disappears and lumps remain.
- Fritters spread too thin: Batter was too wet from juicy apples or too much liquid. Pat diced apples dry before folding in.
- Glaze won’t stick: Fritters cooled too much before glazing. Brush glaze on while fritters are still warm from the oven.
- Glaze burned under broiler: Broiler was too hot or fritters too close to heat source. Move rack lower or reduce time.
- Centers are gummy: Apples released too much moisture or fritters not baked long enough. Bake full 10 minutes before glazing.
- Glaze stays sticky: Did not let fritters sit long enough after final glaze application. Wait full 15 minutes for proper setting.
- Fritters stuck to pan: Pan not greased adequately. Use generous amount of nonstick spray covering entire surface.
Perfect Pairings and Serving Ideas
- Serve warm Apple Fritter Bites alongside hot coffee, spiced chai tea, or warm apple cider for the ultimate fall breakfast or snack.
- Add to brunch spreads with scrambled eggs, bacon, and fresh fruit for a sweet component that balances savory dishes.
- Create a dessert board with these fritters, caramel sauce for dipping, whipped cream, and fresh apple slices.
- Pack in lunch boxes as a special treat that travels well and stays fresh throughout the school or work day.
- Offer at tailgating parties or fall gatherings where finger foods and portable treats are most practical.
- Drizzle with salted caramel, maple syrup, or chocolate sauce for extra indulgence at dessert time.
- Serve with vanilla ice cream or whipped cream as an elegant plated dessert for dinner parties.
- Pair with sharp cheddar cheese for a sweet-savory combination that highlights the apple flavor beautifully.
Frequently Asked Questions
Can I use apple juice instead of apple cider?
Yes, apple juice works as a substitute though the flavor will be slightly less complex and robust than using real apple cider. For best results, look for unfiltered apple juice which has more apple flavor. You can also use pear cider or even orange juice for interesting flavor variations.
Why do I need to broil the fritters?
The broiling step caramelizes the first layer of glaze, creating that signature crackly, crystallized coating that makes fritters special. Without broiling, the glaze stays soft and sticky rather than developing the crispy shell. Watch carefully and rotate frequently to prevent burning since broilers vary in intensity.
Can I make these without applesauce?
You can substitute an equal amount of sour cream or Greek yogurt for the applesauce, though you will lose some apple flavor. Another option is to use mashed banana, which provides similar moisture and binding properties. The texture will be slightly different but still delicious with any of these substitutions.
How do I know when the glaze is caramelized enough?
Look for vigorous bubbling across the surface and patches of deeper golden color forming, typically after 2 to 4 minutes under the broiler. The glaze should look glossy and slightly darkened but not burned or blackened. Rotate the pan every minute to ensure even caramelization and prevent hot spots from burning.
Can I make mini versions in a mini muffin tin?
Yes, these work wonderfully in greased mini muffin tins. Fill each cup about two-thirds full and bake at 400 degrees Fahrenheit for 8 to 10 minutes. The broiling and glazing process remains the same, though you may need slightly less glaze since the surface area is smaller.
Why are my fritters not puffing up?
Old baking powder that has lost its potency will not create proper rise. Check the expiration date and test baking powder by stirring a teaspoon into hot water—it should fizz vigorously if still active. Also ensure you are not overmixing the batter, which deflates air bubbles needed for lift.
Can I make these gluten-free?
Yes, substitute a gluten-free all-purpose flour blend that includes xanthan gum for regular flour in a 1:1 ratio. The texture will be slightly more delicate but still delicious. Make sure all other ingredients including baking powder are certified gluten-free if needed for celiac disease or severe sensitivities.

Apple Fritter Bites
Ingredients
Equipment
Method
- Preheat and Prep: Preheat oven to 400°F. Grease a large baking sheet thoroughly with nonstick cooking spray.
- Mix Dry Ingredients: In a medium bowl, whisk together flour, baking powder, salt, and cinnamon until evenly distributed.
- Mix Wet Ingredients: In a large bowl, whisk melted butter and sugar until combined. Whisk in egg, vanilla, and applesauce until smooth.
- Combine and Add Apples: Add dry ingredients to wet ingredients and stir just until combined. Gently fold in diced apples.
- Portion and Bake: Scoop 1-tablespoon portions of batter onto prepared baking sheet, spacing 2 inches apart. Bake 10 minutes until puffed and set. Remove from oven and turn broiler to high.
- Make Glaze: Whisk together powdered sugar and apple cider until smooth and thin enough to drip easily.
- First Glaze and Broil: Brush about half the glaze over warm fritters, letting it drip down sides. Broil 2-4 minutes, rotating pan frequently, until glaze bubbles and caramelizes.
- Final Glaze and Set: Remove from broiler and brush remaining glaze evenly over tops. Let sit 15 minutes for glaze to set before serving.
Notes
- Apple Prep: Dice apples very finely (1/4-inch pieces) for best distribution and texture in each bite.
- Don’t Overmix: Stir batter only until flour disappears. Lumps are okay and will bake out.
- Glaze Consistency: Glaze should be thin like heavy cream. Add more cider if too thick.
- Watch the Broiler: Broiler intensity varies. Rotate pan every minute and watch closely to prevent burning.
- Cooling Time: Full 15-minute rest after glazing is essential for proper crackly texture.
- Storage: Store airtight at room temperature 2 days or refrigerate up to 5 days. Freeze up to 2 months.
- Reheating: Warm in 300°F oven for 5 minutes. Do not microwave as it ruins glaze texture.