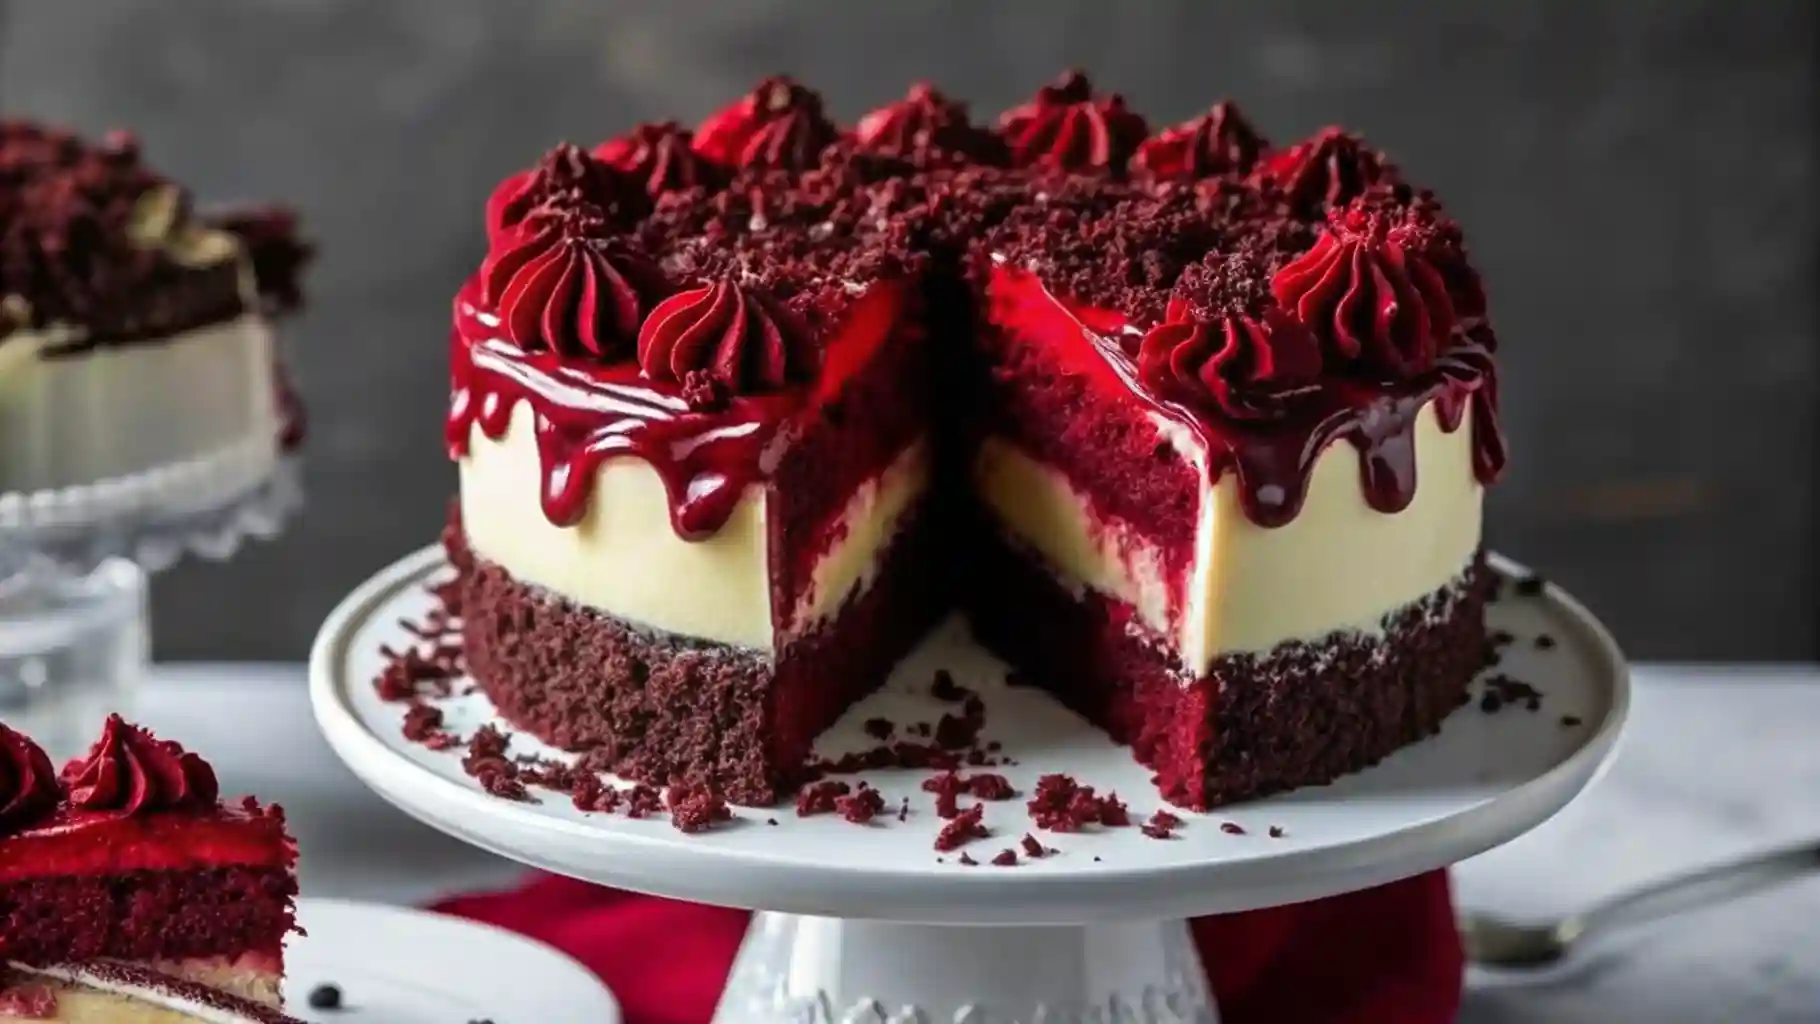
My grandmother used to make red velvet cake for every birthday in our family, and the rich cocoa flavor combined with that signature tangy cream cheese frosting became the taste of celebration for me. Years later when I discovered cheesecake, I started dreaming about combining these two beloved desserts into one spectacular creation. This Red Velvet Cheesecake Layer Cake Recipe represents everything I love about both desserts—the tender, moist crumb of red velvet cake layered with dense, creamy cheesecake and finished with silky cream cheese frosting that melts on your tongue. The optional chocolate cookie crust adds another dimension of texture and flavor that makes each bite interesting from bottom to top. That glossy red berry glaze cascading down the sides creates drama and visual appeal that makes this cake worthy of the most special occasions, from weddings and anniversaries to milestone birthdays and holiday gatherings. The vibrant red color comes from gel food coloring rather than the traditional beets or cocoa alone, giving you control over how deep and dramatic you want that signature hue. Despite looking incredibly complex and bakery-worthy, this cake comes together using straightforward techniques that any home baker can master with a little patience and attention to detail. The cheesecake layer can be made a full day ahead, which actually improves its texture and makes assembly much easier when you are ready to put everything together. Serving this towering beauty brings gasps of delight before anyone even tastes it, and that first bite delivers on all the visual promises with perfectly balanced flavors and textures.
Why This Red Velvet Cheesecake Layer Cake Works
Red velvet cake gets its characteristic tender crumb from the combination of buttermilk, vinegar, and baking soda working together. The acid in the buttermilk and vinegar reacts with the baking soda to create a fine, delicate texture while also helping the cocoa powder develop its flavor more fully. Using vegetable oil instead of butter keeps the cake incredibly moist without feeling heavy or greasy.
The cheesecake layer provides rich contrast to the lighter cake layers. Beating the cream cheese until completely smooth before adding other ingredients prevents lumps and creates that signature velvety texture. Adding eggs one at a time and mixing just until incorporated prevents overbeating, which can cause cracks during baking. The slight jiggle in the center when you remove it from the oven firms up perfectly during cooling.
Cream cheese frosting ties everything together with its tangy sweetness that complements both the red velvet and cheesecake layers. The frosting also acts as glue between layers, helping the cake stay stable and preventing sliding. Chilling all components before assembly makes stacking much easier and creates cleaner lines when you frost the outside.
Ingredients for Red Velvet Cheesecake Layer Cake
Chocolate Cookie Crust (Optional)
- 2 cups (200 g) chocolate cookie crumbs from Oreos or similar cookies, filling removed
- 1/2 cup (115 g) unsalted butter, melted
Red Velvet Cake Layers
- 2 1/2 cups (315 g) all-purpose flour, spooned and leveled
- 1 1/2 cups (300 g) granulated sugar
- 2 tablespoons cocoa powder, unsweetened
- 1 teaspoon baking soda
- 1 teaspoon baking powder
- 1 teaspoon salt
- 1 1/2 cups (360 ml) buttermilk, or make your own with milk plus 1 tablespoon vinegar
- 1 cup (240 ml) vegetable oil, or use canola oil
- 2 large eggs, at room temperature
- 2 teaspoons vanilla extract, pure vanilla tastes best
- 1 teaspoon white vinegar or distilled vinegar
- 1 to 2 tablespoons red gel food coloring, adjust for desired color intensity
Cheesecake Layer
- 16 ounces (450 g) cream cheese, softened to room temperature
- 1/2 cup (100 g) granulated sugar
- 2 large eggs, at room temperature
- 1 teaspoon vanilla extract
- 1/2 cup (120 ml) sour cream or heavy cream for richness
Cream Cheese Frosting
- 16 ounces (450 g) cream cheese, softened to room temperature
- 1 cup (230 g) unsalted butter, softened
- 4 cups (480 g) powdered sugar, sifted to remove lumps
- 2 teaspoons vanilla extract
Red Berry Glaze
- 1/2 cup (120 ml) strawberry or raspberry jam, seedless works best
- 2 tablespoons water
- 1 teaspoon lemon juice, freshly squeezed
Decoration
- Red velvet cake crumbs from trimming the layers
- Dark chocolate chips for contrast
- Extra frosting for piping decorative borders
How to Make Red Velvet Cheesecake Layer Cake
Start by making the optional chocolate cookie crust if you want that extra layer of flavor and texture. Mix the chocolate cookie crumbs with melted butter in a medium bowl until the mixture resembles damp sand and holds together when pressed. Press this mixture evenly and firmly into the bottom of a 9-inch springform pan, using the flat bottom of a measuring cup to create an even, compact layer. Bake in a preheated 350 degrees Fahrenheit oven for exactly 10 minutes to set the crust, then remove and let it cool completely on a wire rack before adding the cheesecake batter.
Preheat your oven to 350 degrees Fahrenheit and prepare two 9-inch round cake pans by greasing them thoroughly and lining the bottoms with parchment paper circles. In a large mixing bowl, whisk together the all-purpose flour, cocoa powder, baking soda, baking powder, and salt until evenly distributed with no lumps remaining. In a separate large bowl, combine the granulated sugar, vegetable oil, eggs, buttermilk, white vinegar, vanilla extract, and red gel food coloring, whisking vigorously until the mixture looks completely smooth and the color appears uniform throughout.
Pour the wet ingredients into the dry ingredients and gently fold them together using a rubber spatula or wooden spoon, mixing just until you no longer see streaks of flour. Do not overmix or beat the batter vigorously, as this develops gluten and creates a tough cake instead of the tender crumb you want. Divide the batter evenly between your two prepared pans, tapping each pan gently on the counter to release any large air bubbles. Bake for 25 to 30 minutes, or until a toothpick inserted into the center comes out clean or with just a few moist crumbs attached.
Remove the cake layers from the oven and let them cool in the pans for 10 minutes before turning them out onto wire racks to cool completely. While the cakes cool, make the cheesecake layer. In a medium bowl or the bowl of a stand mixer, beat the softened cream cheese and sugar together on medium speed for about 3 minutes until the mixture looks completely smooth with no lumps visible. Scrape down the sides of the bowl frequently to ensure everything incorporates evenly.
Add the eggs one at a time to the cream cheese mixture, beating well after each addition and scraping down the sides of the bowl between eggs. Mix in the vanilla extract and sour cream or heavy cream until fully incorporated and the batter looks silky smooth. Pour this cheesecake batter over your cooled cookie crust in the springform pan, or into a lined 9-inch pan if you skipped the crust. Smooth the top with an offset spatula.
Reduce your oven temperature to 325 degrees Fahrenheit and bake the cheesecake for 40 to 45 minutes, or until the edges look set but the center still has a slight jiggle when you gently shake the pan. The residual heat will continue cooking the center as it cools, and overbaking creates a dry, cracked cheesecake. Remove from the oven and let the cheesecake cool completely at room temperature, then refrigerate for at least 4 hours or overnight until thoroughly chilled and firm.
Make the cream cheese frosting by beating the softened cream cheese and butter together in a large bowl until completely smooth and creamy with no lumps, about 3 minutes. Add the sifted powdered sugar one cup at a time, mixing on low speed after each addition to prevent a sugar cloud in your kitchen. Once all the sugar incorporates, add the vanilla extract and beat on medium-high speed for 2 minutes until the frosting looks light and fluffy.
Assemble your cake by placing one completely cooled red velvet layer on your serving plate or cake stand. Spread about 1 cup of cream cheese frosting over the top, creating an even layer that goes all the way to the edges. Carefully remove the chilled cheesecake from its pan and place it on top of the frosted red velvet layer. Spread another cup of frosting over the top of the cheesecake layer, then gently place the second red velvet layer on top.
Apply a thin crumb coat of frosting over the entire cake, covering the sides and top with a very thin layer that seals in any loose crumbs. Refrigerate the cake for 30 minutes to let this crumb coat firm up, then apply the remaining frosting in a thicker, final coat. Use an offset spatula or bench scraper to smooth the sides and create clean, professional-looking edges. Refrigerate the frosted cake while you prepare the glaze.
Make the red berry glaze by combining the strawberry or raspberry jam, water, and lemon juice in a small saucepan over low heat. Stir constantly until the mixture becomes thin and pourable, about 2 to 3 minutes. Remove from heat and let it cool for about 5 minutes until it thickens slightly but remains pourable. Pour the glaze over the top center of your chilled cake, using a spoon to gently encourage drips down the sides if needed.
Decorate the finished cake by piping rosettes or borders with any remaining frosting, then sprinkle red velvet cake crumbs around the top edge and scatter dark chocolate chips for visual interest and textural contrast. Refrigerate the finished cake for at least 1 hour before serving to let everything set properly.
Expert Tips for Perfect Results
- Use gel food coloring instead of liquid for vibrant red color without adding excess moisture to the batter. Start with less and add more gradually.
- Bring all dairy ingredients to room temperature before mixing. Cold ingredients do not incorporate smoothly and can create lumps in your batter and frosting.
- Do not skip the crumb coat. This thin first layer of frosting seals in crumbs and creates a smooth foundation for your final frosting layer.
- Chill each layer completely before assembly. Warm cake layers will cause the frosting to melt and slide, creating a lopsided, messy cake.
- Level your cake layers with a serrated knife if they dome during baking. Flat, even layers stack more securely and create cleaner lines.
- Bake the cheesecake at lower temperature than the cake layers. High heat causes cheesecake to crack and develop a tough texture.
- Let the berry glaze cool slightly before pouring. Too-hot glaze will melt the frosting and create a mess instead of beautiful drips.
- Use a sharp knife dipped in hot water and wiped clean between cuts for the neatest slices. This prevents dragging and smearing the layers.
Delicious Variations to Try
- Skip the chocolate cookie crust and bake the cheesecake in a lined pan for a simpler version with fewer components to manage.
- Add 1/2 cup of mini chocolate chips to the red velvet batter for extra chocolate flavor and textural interest in every bite.
- Replace the berry glaze with chocolate ganache for a richer, more decadent finish that chocolate lovers will adore.
- Mix cream cheese into the red velvet batter for even more cheesecake flavor running throughout the entire cake.
- Use white chocolate cream cheese frosting by melting 4 ounces of white chocolate and beating it into the standard frosting recipe.
- Make mini versions by baking the cake in 4-inch pans and creating individual layered cakes for elegant individual servings.
- Add a teaspoon of espresso powder to the red velvet batter to deepen the chocolate flavor without making it taste like coffee.
- Top with fresh berries like raspberries or strawberries instead of the glaze for a lighter, fresher presentation.
Troubleshooting Common Problems
- Cracked cheesecake layer: Overbaked or mixed too vigorously. Bake just until the edges set and the center still jiggles slightly.
- Dry red velvet cake: Too much flour or overbaking. Measure flour by spooning it into the cup and leveling, never scooping directly from the bag.
- Sliding layers: Cake was not chilled long enough before assembly or the frosting was too soft. Refrigerate everything before stacking.
- Lumpy frosting: Cream cheese or butter was too cold. Let them sit at room temperature for 30 to 60 minutes before beating.
- Glaze melting the frosting: Glaze was too hot when poured. Let it cool for 5 to 10 minutes until slightly thickened but still pourable.
- Dense, heavy cake layers: Overmixed the batter after adding dry ingredients. Mix just until flour disappears and no longer.
- Pale red color: Not enough food coloring or liquid coloring instead of gel. Use gel coloring and add more for deeper hue.
Make Ahead and Storage Tips
This Red Velvet Cheesecake Layer Cake stores beautifully and actually benefits from being made ahead, which allows flavors to meld and makes the layers easier to handle. Bake the red velvet cake layers up to 2 days in advance, wrap them tightly in plastic wrap, and store at room temperature until ready to assemble. The cheesecake layer can be made up to 3 days ahead and kept refrigerated in its pan.
The cream cheese frosting can be prepared 2 days in advance and stored in an airtight container in the refrigerator. Bring it to room temperature and rebeat it briefly before using to restore its smooth, spreadable consistency. Assemble the entire cake up to 1 day before serving and keep it refrigerated until about 30 minutes before slicing.
Store leftover cake in an airtight container or covered with plastic wrap in the refrigerator for up to 5 days. The cream cheese frosting and cheesecake layer require refrigeration and will spoil if left at room temperature for extended periods. Let refrigerated cake sit at room temperature for 15 to 20 minutes before serving to soften the frosting slightly.
You can freeze the unfrosted red velvet layers wrapped tightly in plastic wrap and aluminum foil for up to 3 months. The cheesecake layer also freezes well wrapped the same way. Thaw both overnight in the refrigerator before assembling. Do not freeze the fully assembled, frosted cake as the texture of the frosting and glaze will not survive freezing well.
Perfect Pairings and Serving Ideas
- Serve slices with a dollop of freshly whipped cream for extra lightness and a beautiful presentation contrast to the rich cake.
- Pair with hot coffee or espresso to cut through the sweetness and provide a sophisticated flavor combination for adult gatherings.
- Add a scoop of vanilla bean ice cream on the side for a decadent dessert that combines warm and cold elements beautifully.
- Garnish individual slices with fresh raspberries or strawberries to echo the berry glaze and add fresh, bright flavor.
- Dust the plate with cocoa powder before placing the slice for a professional plating technique that adds visual appeal.
- Serve alongside sparkling wine or champagne for celebrations and special occasions where the bubbles complement the rich dessert.
- Offer with hot tea for afternoon gatherings, choosing black tea or Earl Grey that stands up to the richness of the cake.
- Create a dessert trio by serving small slices with two other complementary desserts for an elegant tasting menu presentation.
Frequently Asked Questions
Can I skip the chocolate cookie crust?
Absolutely. The crust is optional and adds texture and flavor but is not essential to the recipe. Simply bake the cheesecake layer in a lined 9-inch pan without the crust and proceed with assembly as directed. The cake will still be delicious and impressive without it.
Why is my red velvet cake not very red?
You likely need more food coloring or are using liquid instead of gel. Gel food coloring is much more concentrated and provides vibrant color without thinning the batter. Start with 1 tablespoon and add more gradually until you achieve your desired deep red hue.
How do I prevent my cheesecake from cracking?
Bake the cheesecake at a lower temperature of 325 degrees Fahrenheit and remove it when the center still jiggles slightly. Overmixing the batter also creates cracks, so beat just until smooth. The residual heat continues cooking the center as it cools, so slight underbaking actually produces perfect texture.
Can I make this cake gluten-free?
Yes, substitute the all-purpose flour with a gluten-free baking blend that contains xanthan gum. Make sure all other ingredients like baking powder and food coloring are certified gluten-free. The texture may be slightly different but will still taste delicious.
How far in advance can I assemble this cake?
You can fully assemble and decorate the cake up to 24 hours before serving. Store it covered in the refrigerator and remove it 30 minutes before serving to take the chill off slightly. The flavors actually improve after sitting overnight as they meld together.
What if I do not have buttermilk?
Make your own by adding 1 tablespoon of white vinegar or lemon juice to 1 1/2 cups of regular milk. Stir and let it sit for 5 minutes until it curdles slightly. This homemade buttermilk works perfectly in this recipe and provides the same tangy flavor and tender texture.
Why is my cake lopsided or sliding?
The layers were not completely chilled before assembly or your frosting was too soft and warm. Make sure all cake components are thoroughly chilled and the frosting is cool but still spreadable. Refrigerating between layers also helps prevent sliding and creates a more stable structure.
Red Velvet Cheesecake Layer Cake
Ingredients
Equipment
Method
- Make Cookie Crust (Optional): Mix chocolate cookie crumbs with melted butter until resembling wet sand. Press evenly into bottom of 9-inch springform pan. Bake at 350°F (175°C) for 10 minutes. Cool completely.
- Bake Red Velvet Layers: Preheat oven to 350°F (175°C). Grease and line two 9-inch round pans. Whisk together flour, cocoa powder, baking soda, baking powder, and salt. In separate bowl, blend sugar, oil, eggs, buttermilk, vinegar, vanilla, and red food coloring. Combine wet into dry ingredients, mixing just until smooth. Divide between pans and bake 25-30 minutes until toothpick comes out clean. Cool completely.
- Make Cheesecake Layer: Beat softened cream cheese and sugar until smooth. Add eggs one at a time, beating well after each. Mix in vanilla and sour cream. Pour over cooled crust or into lined pan. Bake at 325°F (160°C) for 40-45 minutes until edges set but center slightly jiggles. Cool completely and refrigerate at least 4 hours.
- Make Cream Cheese Frosting: Beat cream cheese and butter until smooth, about 3 minutes. Add powdered sugar one cup at a time, mixing on low. Add vanilla and beat on medium-high for 2 minutes until light and fluffy.
- Assemble Cake: Place one red velvet layer on serving plate. Spread 1 cup frosting on top. Add chilled cheesecake layer. Spread another cup frosting on cheesecake. Top with second red velvet layer. Apply thin crumb coat over entire cake. Refrigerate 30 minutes. Apply final thick coat of frosting, smoothing sides and top.
- Add Glaze and Decorate: Warm jam, water, and lemon juice over low heat until pourable. Cool slightly, then pour over top center of cake, allowing drips down sides. Pipe decorative frosting borders. Sprinkle with red velvet crumbs and chocolate chips. Refrigerate at least 1 hour before serving.
Notes
- Chill All Layers: Chill all cake layers before assembling to prevent sliding and ensure stable stacking.
- Use Gel Coloring: Use gel food coloring instead of liquid for vibrant red color without thinning batter.
- Make Ahead: Cheesecake layer can be made a day ahead and stored in refrigerator.
- Storage: Keeps well in fridge for 4-5 days. Best served slightly chilled.
- Gluten-Free: Substitute all-purpose flour with gluten-free blend containing xanthan gum.
- Crumb Coat: Don’t skip the crumb coat—it seals in crumbs and creates smooth foundation.
- Room Temperature: Bring all dairy ingredients to room temperature before mixing for smooth batter.