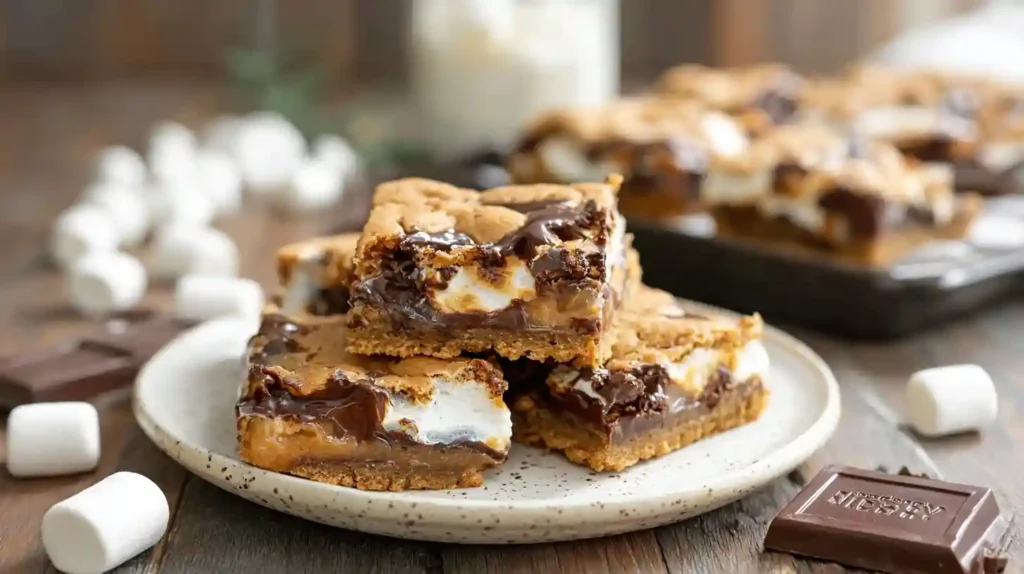
Summer camp was where I first learned to make proper s’mores. Not the kind you char over a stove burner at home, but real ones cooked over a fire pit with sticks we whittled ourselves. The counselor taught us to hold the marshmallow at the edge of the flames, not directly in them, turning it slowly until the outside turned golden and the inside went molten. Then you sandwich it between graham crackers with a piece of chocolate and press gently so everything melds together. The chocolate never fully melted from the heat of the marshmallow alone, but that was part of the charm. Years later, when I wanted that s’mores experience without building a fire, I started experimenting with oven versions. Most recipes I found were disappointing. Either the graham crackers got soggy, the marshmallows burned, or the chocolate turned grainy. These S’mores Cookie Bars solve all those problems. The Graham cracker base stays crisp. The marshmallows toast perfectly under the broiler. The chocolate melts just enough without seizing. Everything you love about campfire s’mores, but made in a pan in your kitchen.
How These Bars Work
The structure of these bars mimics traditional s’mores but adapts each component for oven baking[file:34]. The bottom layer is whole graham crackers laid flat in the pan. They provide structure and stay crisp because they bake on top of the cookie dough rather than underneath it. If you put the graham crackers directly on the bottom of the pan, they would absorb moisture and turn soft. Placing them between the pan and the dough protects them.
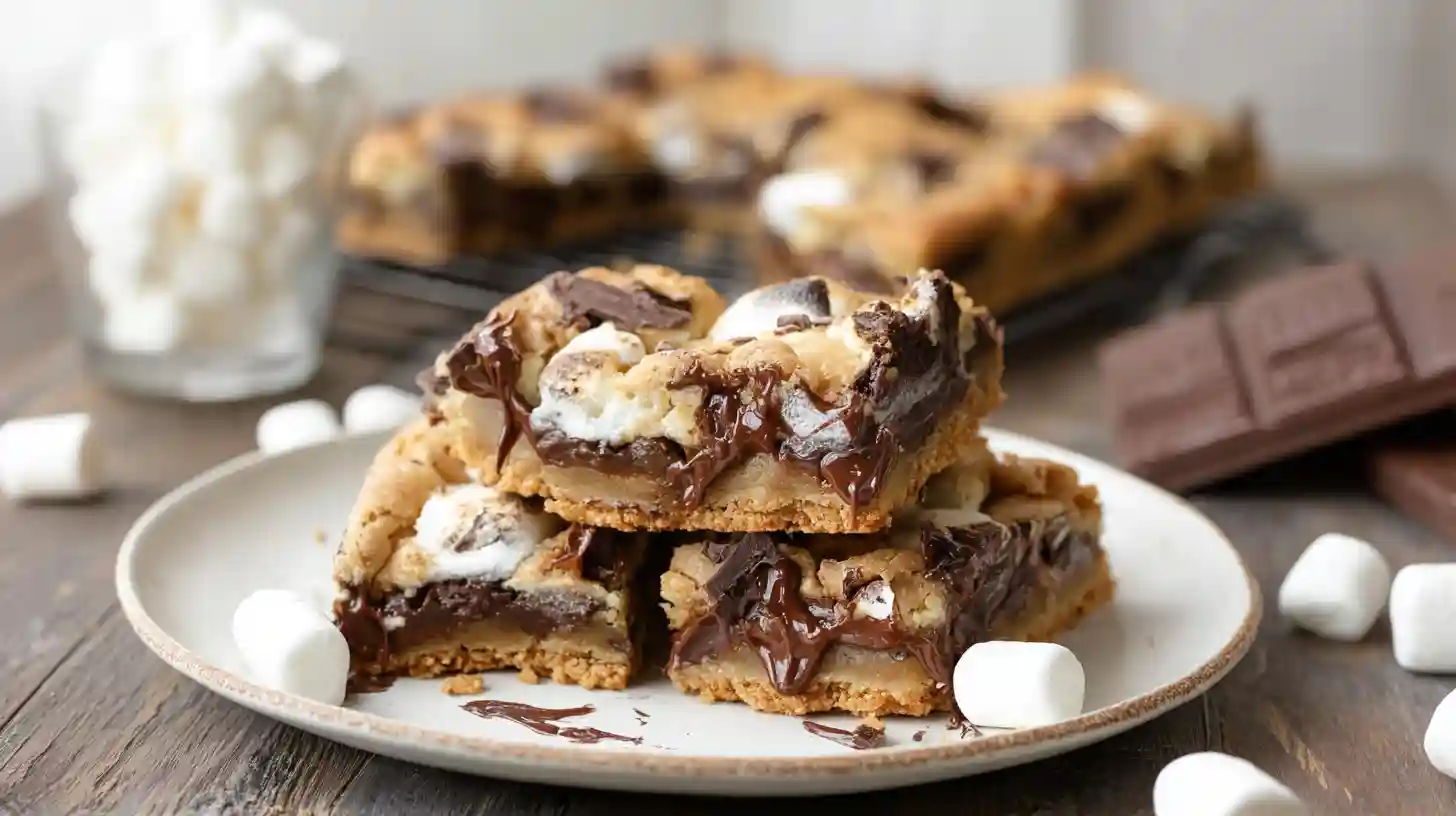
The middle layer is chocolate chip cookie dough mixed with mini marshmallows[file:34]. The marshmallows melt slightly as the bars bake, creating pockets of gooey sweetness throughout the cookie layer. Additional marshmallows go on top before the final bake. These get toasted under the broiler at the end, giving you that charred campfire look and flavor. The chocolate comes in at the finish. After the bars come out of the oven, you press the chocolate bar pieces into the warm surface. They soften and melt slightly from the residual heat without turning grainy from direct oven exposure.
Ingredients You Will Need
For the cookie dough layer, you need half a cup of unsalted butter at room temperature[file:34]. One-third cup of granulated sugar and one-third cup of packed brown sugar provide sweetness and moisture. One large egg binds everything together. One and a half teaspoons of vanilla extract add depth. For the dry ingredients, use one and a quarter cups of all-purpose flour. Half a teaspoon of baking soda helps the dough rise and spread properly. A quarter teaspoon of salt balances the sweetness.
You need one cup of semi-sweet chocolate chips for the cookie dough[file:34]. Mini chocolate chips work better than regular-sized ones because they distribute more evenly. One cup of mini marshmallows gets folded into the dough. Use mini marshmallows, not regular-sized ones. Regular marshmallows are too large and create uneven pockets. For the topping, you need another cup of mini marshmallows and two full-sized Hershey’s chocolate bars, broken into pieces. The Hershey’s bars are traditional for s’mores, but you can use any chocolate you prefer.
The base requires about eight full-sized graham cracker sheets[file:34]. You will need to break them to fit your pan. Use regular honey graham crackers, not cinnamon or chocolate varieties. Those flavors compete with the s’mores taste instead of complementing it.
Making the Cookie Dough
In a large bowl, cream together the butter and both sugars using an electric mixer on medium speed[file:34]. Beat for two to three minutes until the mixture becomes light and fluffy. This aeration is important. It creates a cookie layer that is tender rather than dense. Add the egg and vanilla extract. Mix on low speed just until combined. Stop and scrape down the sides of the bowl with a spatula to ensure everything is incorporated evenly
In a separate bowl, whisk together the flour, baking soda, and salt[file:34]. Add the dry ingredients to the wet ingredients. Mix on low speed just until you stop seeing streaks of flour. Do not overmix. Overmixing develops gluten, which makes the cookie layer tough instead of tender. The dough should look thick and slightly crumbly. Use a spatula to fold in the chocolate chips and one cup of mini marshmallows. Fold gently until they are evenly distributed throughout the dough. Set the bowl aside while you prepare the pan.
Assembling the Bars
Preheat your oven to 350 degrees Fahrenheit[file:34]. Line an eight-by-eight-inch baking pan with parchment paper. Leave overhang on two opposite sides so you can lift the bars out after baking. This makes cutting much cleaner. Do not skip the parchment paper. These bars are sticky, and they will be nearly impossible to remove from the pan without it.
Break the graham crackers to fit the bottom of your prepared pan[file:34]. You want to cover as much of the bottom surface as possible. Small gaps are fine, but try to create a relatively complete layer. The Graham crackers do not need to be perfectly aligned. Rustic is good here. Press them down gently so they lie flat against the parchment.
Drop spoonfuls of the cookie dough on top of the graham crackers[file:34]. Use your hands or the back of a spoon to gently press and spread the dough into an even layer that covers all the graham crackers. The dough will be thick and sticky. Wet your hands slightly if they keep sticking to your fingers. You want the dough layer to be relatively uniform in thickness so it bakes evenly. Do not press too hard or you will break the graham crackers underneath.
Baking the Bars
Place the pan in the preheated oven and bake for twenty-five to thirty minutes[file:34]. Start checking at twenty-five minutes. The edges should be golden brown and pulling away slightly from the sides of the pan. The center should look set but may still seem slightly soft. This is correct. The bars will continue to set as they cool. If you bake them until the center looks completely done, they will be dry and overbaked once they cool.
Remove the pan from the oven and immediately scatter the remaining cup of mini marshmallows on top[file:34]. Use your hands to distribute them evenly across the entire surface. Turn your oven to broil and adjust the rack so it is about six inches from the heating element. Return the pan to the oven and broil for one to two minutes, watching constantly. The marshmallows will puff up, brown, and char slightly. This happens fast. Do not walk away. If your broiler is very strong, it may only take thirty to sixty seconds. The marshmallows should look golden with some darker brown spots, like they were toasted over a campfire.
As soon as the marshmallows are toasted to your liking, remove the pan from the oven[file:34]. Immediately press the chocolate bar pieces into the top of the bars while everything is still hot. The chocolate will begin to melt from the residual heat. This is exactly what you want. Let the bars cool completely in the pan before attempting to lift them out or slice them. This takes at least two hours at room temperature, sometimes longer.
Cutting and Serving
Once the bars have cooled completely, use the parchment paper overhang to lift the entire slab out of the pan[file:34]. Place it on a cutting board. Use a sharp knife to cut the bars into squares. Wipe the knife clean between each cut for the neatest edges. These bars are sticky and gooey, so clean cuts require a clean knife each time. If the chocolate and marshmallow have set too firmly and crack when you cut, let the bars sit at room temperature for a few more minutes to soften slightly.
These bars are best served at room temperature or slightly warm[file:34]. If you want to serve them warm, cut them when cool, then reheat individual squares in the microwave for ten to fifteen seconds. The marshmallows will puff up again and the chocolate will get melty. They taste incredible this way, like s’mores fresh from the fire.
Tips for Perfect Bars
- Use mini marshmallows, not regular-sized ones, for even distribution.
- Watch the broiler constantly when toasting the marshmallows to prevent burning.
- Add the chocolate immediately after removing it from the oven so it melts properly.
- Cool completely before cutting for clean slices.
- Line the pan with parchment paper for easy removal.
Common Mistakes to Avoid
The biggest mistake is burning the marshmallows under the broiler[file:34]. Broilers vary wildly in intensity. Some take two minutes to toast marshmallows, others take thirty seconds. Stay in front of the oven and watch through the window. Once the marshmallows start to brown, things happen fast. Pull them out when they look how you want them. You can always put them back in for a few more seconds if needed, but you cannot undo burned marshmallows.
Another common mistake is trying to cut the bars before they have fully cooled. Warm bars will fall apart and stick to the knife. The cookie layer needs time to set completely, and the marshmallows and chocolate need to firm up. Be patient. Two hours at room temperature is the minimum. If your kitchen is very warm, you can speed up the process by refrigerating the bars for thirty minutes, but let them come back to room temperature before serving for the best texture.
Using regular-sized marshmallows instead of mini ones creates uneven texture[file:34]. Regular marshmallows leave large gaps between them, and they melt differently during baking. Mini marshmallows distribute evenly throughout the dough and create consistent pockets of gooeyness. Not lining the pan with parchment paper makes removal nearly impossible. The marshmallows stick to the pan like glue. Always use parchment with plenty of overhang.
Variations to Try
For a peanut butter version, replace half the chocolate chips with peanut butter chips. The combination of peanut butter, chocolate, and marshmallow tastes like a Reese’s s’more. You can also use dark chocolate instead of semi-sweet for a less sweet, more sophisticated bar. Dark chocolate pairs especially well with the sweetness of the marshmallows. For a more intense chocolate experience, use chocolate graham crackers for the base instead of regular ones.
Add a quarter teaspoon of cinnamon to the cookie dough for a warming spice note[file:34]. This makes the bars taste more campfire-authentic. For a grown-up twist, sprinkle sea salt over the melted chocolate pieces right after pressing them into the bars. The salt cuts the sweetness and adds sophistication. You can also swirl a few tablespoons of Nutella into the cookie dough before spreading it in the pan for a hazelnut chocolate variation.
Storing and Serving
Store the bars in an airtight container at room temperature for up to four days. Layer them with parchment paper between each layer to prevent sticking. The graham crackers will soften slightly over time, but the bars will still taste delicious. Do not refrigerate them unless your kitchen is extremely warm. Refrigeration makes the cookie layer hard and the chocolate chalky.
These bars do not freeze well after assembly. The marshmallows become rubbery, and the graham crackers turn soggy when thawed. If you want to make them ahead, you can prepare the cookie dough and refrigerate it for up to three days before assembling and baking. Bring the dough to room temperature before spreading it in the pan, or it will be too stiff to work with.
Why This Recipe Works
This recipe works because it solves the three main problems with most s’mores bar recipes[file:34]. First, placing the graham crackers between the pan and the dough keeps them crisp. Second, toasting the marshmallows under the broiler after baking gives you that authentic campfire char without burning the rest of the bar. Third, adding the chocolate at the very end prevents it from seizing or burning in the oven. Each component is treated individually according to its specific needs, then brought together at the right moment.
The cookie dough base is sturdy enough to hold everything together but tender enough to bite through easily[file:34]. The marshmallows stay gooey in the middle while getting toasted and slightly crisp on top. The chocolate melts just enough to stick to the surface but maintains its texture. Everything tastes exactly like s’mores should taste, just without the campfire smoke and sticky fingers. Make these once and they will become your go-to summer dessert.
Frequently Asked Questions
Can I use regular-sized marshmallows?
No, mini marshmallows work much better. Regular marshmallows are too large and create uneven distribution in the dough. They also melt differently and can create large gaps. Mini marshmallows disperse evenly and melt into consistent pockets throughout the bars.
What if I do not have a broiler?
You can use a kitchen torch to toast the marshmallows instead. Hold the torch several inches away and move it constantly to avoid burning. This actually gives you more control than a broiler. If you have neither a broiler nor a torch, skip the toasting step. The bars will still taste good, just without the charred marshmallow flavor.
Can I make these in a larger pan?
Yes, you can double the recipe and bake it in a nine-by-thirteen-inch pan. The baking time will be about the same, maybe two to three minutes longer. Check for doneness at twenty-five minutes and adjust as needed.
Why did my graham crackers get soggy?
If your graham crackers got soggy, you either overbaked the bars or did not let them cool completely before cutting[file:34]. Overbaking causes the cookie layer to release excess moisture, which soaks into the crackers. Cutting warm bars also releases steam that softens the crackers. Cool completely before slicing.
Can I use chocolate graham crackers?
Yes, chocolate graham crackers work well and add extra chocolate flavor. They are especially good if you are a chocolate lover. The flavor is more intense but still balanced by the marshmallows.
My marshmallows burned under the broiler. What went wrong?
Broilers vary significantly in intensity. Some are very powerful and toast marshmallows in thirty seconds. Start by checking after one minute, then every fifteen seconds after that. Stay in front of the oven and watch through the window. Once they start browning, they go fast.
Do these need to be refrigerated?
No, store them at room temperature in an airtight container. Refrigeration makes the cookie layer hard and the chocolate dull. They keep well for up to four days at room temperature. If your kitchen is very warm and the chocolate is melting, you can refrigerate it, but let it come to room temperature before serving.
S’mores Cookie Bars
Ingredients
Equipment
Method
- Make Cookie Dough: In large bowl with electric mixer, cream butter and both sugars on medium speed for 2 to 3 minutes until light and fluffy. Add egg and vanilla, mixing on low until combined. Scrape down bowl.
- Add Dry Ingredients: In separate bowl, whisk together flour, baking soda, and salt. Add to wet ingredients and mix on low just until no flour streaks remain. Do not overmix. Fold in chocolate chips and 1 cup mini marshmallows until evenly distributed.
- Prepare Pan: Preheat oven to 350°F (175°C). Line 8×8-inch pan with parchment paper, leaving overhang on two sides. Break graham crackers to fit bottom of pan, covering as much surface as possible.
- Assemble: Drop spoonfuls of cookie dough over graham crackers. Gently press and spread into even layer covering all crackers. Wet hands slightly if dough is too sticky.
- Bake: Bake for 25 to 30 minutes until edges are golden and pulling away from sides. Center should look set but may seem slightly soft. Do not overbake.
- Toast Marshmallows: Remove from oven and immediately scatter remaining 1 cup mini marshmallows on top. Turn oven to broil. Place pan under broiler 6 inches from heat. Broil for 1 to 2 minutes, watching constantly, until marshmallows are golden with brown spots.
- Add Chocolate: Remove from oven immediately and press chocolate bar pieces into hot surface. Chocolate will begin to melt from residual heat. Let cool completely in pan, at least 2 hours.
- Cut and Serve: Use parchment overhang to lift bars from pan. Place on cutting board and cut into 16 squares with sharp knife, wiping knife clean between cuts. Serve at room temperature or slightly warm.