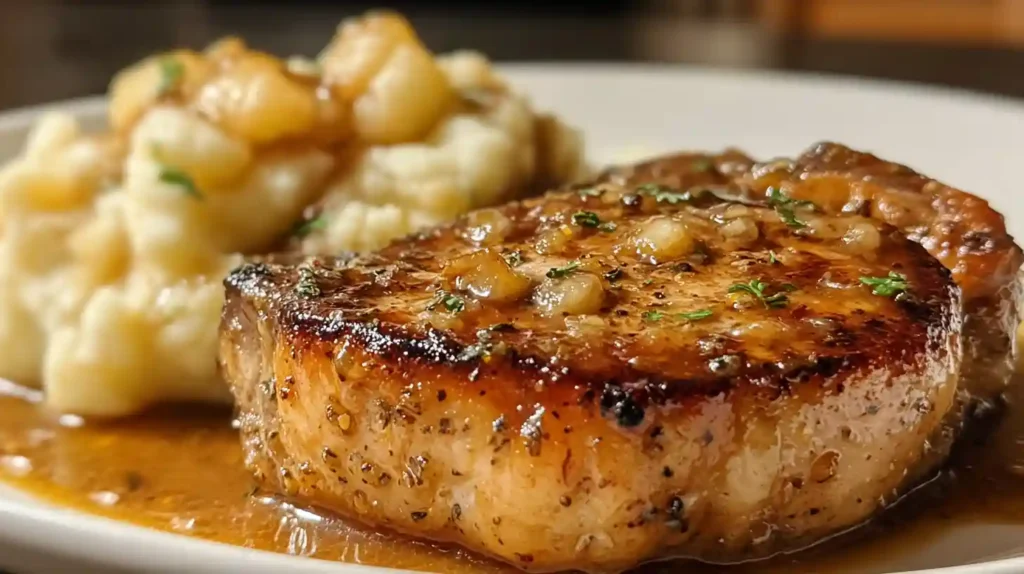
There’s something about a perfectly cooked pork chop that makes you feel like you’re dining at your favorite steakhouse, and nobody does it better than Texas Roadhouse. The first time I bit into one of their pork chops, I was hooked by that incredible smoky-savory crust, the juicy, tender meat, and that simple but addictive garlic butter finish. After years of ordering them every time I visited, I finally cracked the code to recreating them at home. This Texas Roadhouse pork chop copycat recipe delivers all those restaurant flavors you love without the wait or the price tag. The secret lies in choosing thick bone-in chops, building layers of flavor with the right spice blend, getting a gorgeous sear, and finishing with butter and fresh garlic. What I love most about this recipe is how it transforms simple ingredients into something that tastes expensive and complicated, but actually comes together in under thirty minutes. Whether you’re craving that Texas Roadhouse experience on a random Tuesday or want to impress dinner guests, these pork chops deliver every single time.
Why This Recipe Works
The magic of Texas Roadhouse pork chops starts with understanding what makes them special. These aren’t your average thin, dry pork chops – they’re thick, bone-in cuts that stay incredibly juicy during cooking. The bone acts as a heat conductor and adds flavor, while the extra thickness allows for a deep, caramelized crust without overcooking the interior. The spice blend is carefully balanced to hit all the right notes: garlic powder and onion powder for savory depth, smoked paprika for that signature smokiness and color, dried thyme for earthiness, and plenty of black pepper for warmth.
The cooking method combines two techniques for the best results. First, searing in a hot skillet creates that beautiful brown crust through the Maillard reaction – where proteins and sugars caramelize to create complex flavors. Then finishing in the oven ensures even cooking throughout without burning the exterior. Adding butter and fresh garlic at the end creates a simple but luxurious sauce that coats the meat and adds richness. The honey mustard sauce variation brings sweetness and tang that cuts through the richness beautifully. Letting the meat rest after cooking allows the juices to redistribute, ensuring every bite is moist and flavorful rather than dry.
Choosing the Right Pork Chops
The cut of pork chop makes all the difference in this recipe. You absolutely want bone-in pork chops, specifically center-cut rib chops or loin chops. The bone adds flavor during cooking and helps the meat stay moist. Center-cut chops have a nice balance of meat and a smaller, more manageable bone compared to shoulder chops. Look for chops that are at least one inch thick, preferably closer to one and a quarter inches. This thickness is crucial – it gives you enough time to develop that gorgeous crust while keeping the interior perfectly cooked and juicy.
At the meat counter, look for pork chops with good marbling – those thin lines of fat running through the meat. More marbling means more flavor and juiciness. The meat should be pinkish-red, not gray or brown, and shouldn’t have excessive liquid in the package. Avoid chops labeled “enhanced” or “solution added” – these have been injected with saltwater solutions that can make them taste watery and interfere with proper browning. Fresh, natural pork chops are always better for this recipe. If your chops are closer to three-quarters inch thick, that’s okay, but reduce the oven time to prevent overcooking.
The Spice Blend
The seasoning blend for these pork chops is simple but powerful. Garlic powder and onion powder form the savory foundation – they provide concentrated flavor that fresh garlic and onion can’t match when you’re creating a dry rub. Ensure your spices are relatively fresh; old garlic powder and onion powder can have a stale, cardboard-like taste. Smoked paprika is essential for that Texas Roadhouse flavor. Regular paprika will work in a pinch, but smoked paprika brings that characteristic smokiness that makes these taste grilled even when cooked indoors. Hungarian paprika tends to be sweeter and more vibrant, while Spanish smoked paprika has a deeper, more intense smoke flavor.
Dried thyme adds an earthy, slightly minty note that balances the other spices beautifully. If you only have fresh thyme, you can use it, but dried thyme works better in dry rubs because it distributes more evenly and doesn’t burn as easily. Black pepper should be freshly ground if possible; the flavor difference is noticeable. Use more than you think you need; these chops can handle a generous amount of pepper without being too spicy. Salt is added to taste, but remember that you want enough to season the meat thoroughly. A good rule of thumb is about three-quarters teaspoon of salt per chop, but you can adjust based on preference.
Preparing the Pork Chops
Start by removing the pork chops from the refrigerator about twenty to thirty minutes before cooking. Cold meat doesn’t sear as well and can cook unevenly. Pat the chops completely dry with paper towels, pressing firmly to remove all surface moisture. This step is absolutely critical – wet meat steams instead of sears, and you won’t get that beautiful golden-brown crust. Don’t skip this even if it seems excessive. Once dried, lay the chops on a clean plate or cutting board.
Combine all your spices in a small bowl: garlic powder, onion powder, smoked paprika, dried thyme, black pepper, and salt. Mix them thoroughly so the seasoning is uniform. Season both sides of each pork chop generously, pressing the spice mixture into the meat with your hands so it adheres well. Don’t be shy with the seasoning – these thick chops need plenty of flavor. Make sure to season the edges too, not just the flat sides. Let the seasoned chops sit for about ten minutes while you preheat your skillet. This allows the salt to begin penetrating the meat, which improves both flavor and juiciness.
Searing for the Perfect Crust
Use a large oven-safe skillet, preferably cast iron, which retains heat beautifully and creates excellent crusts. If you don’t have cast iron, a heavy stainless steel skillet works well, too. Avoid nonstick pans for this recipe – they don’t get hot enough to create a proper sear. Preheat your oven to 400°F so it’s ready when you need it. Heat the skillet over medium-high heat for several minutes until it’s very hot. You want the pan properly heated before adding oil – this is the secret to preventing sticking and getting great color.
Add the olive oil to the hot pan and swirl to coat. The oil should shimmer and flow easily but not smoke. Carefully place the pork chops in the pan, laying them away from you to avoid oil splatter. Don’t move them once they’re down – let them sit undisturbed. Resist the urge to peek or fidget with them. The chops need full contact with the hot surface to develop that gorgeous crust. After two to three minutes, the bottoms should be deeply golden brown with crispy, caramelized edges. Use tongs to flip each chop carefully and sear the second side for another two to three minutes until equally browned.
The chops won’t be cooked through at this point – that’s completely fine and expected. You’re just building flavor and color. If your kitchen gets smoky during this process, that’s normal when searing meat at high heat. Make sure your exhaust fan is on. Once both sides are beautifully seared, don’t wash the pan – all those browned bits stuck to the bottom are pure flavor that will become part of your finishing sauce.
Finishing in the Oven
After searing, transfer the skillet directly to your preheated 400°F oven. If your skillet isn’t oven-safe, transfer the pork chops to a baking dish at this point, though you’ll lose some of those flavorful pan drippings. Set a timer for ten to twelve minutes, but start checking at the ten-minute mark. The exact time depends on the thickness of your chops and how you like them cooked. Pork is safe to eat at 145°F according to USDA guidelines, and it will be slightly pink in the center at this temperature – perfectly juicy and tender.
Use an instant-read meat thermometer inserted into the thickest part of the chop, away from the bone, to check the temperature. The bone conducts heat, so readings near it will be inaccurately high. When the thermometer reads 140°F to 145°F, remove the skillet from the oven immediately. The temperature will continue rising by about five degrees as the meat rests – this is called carryover cooking. If you wait until the thermometer reads 150°F or higher, your pork chops will end up overcooked and dry. Remember, slightly pink pork is not only safe but also more flavorful and juicy than gray, well-done pork.
The Garlic Butter Finish
Once the pork chops come out of the oven, carefully transfer them to a plate or cutting board to rest. Be very careful with the skillet – the handle will be extremely hot. Use a thick oven mitt and place a kitchen towel over the handle as a reminder. Return the skillet to the stovetop over medium heat. You should see brown bits stuck to the pan – these are the foundation of your sauce. Add the butter to the hot pan and let it melt, swirling it around.
Once the butter melts and starts to foam, add the minced garlic. Fresh garlic is essential here – jarred garlic or garlic powder won’t give you the same punchy, aromatic flavor. Cook the garlic for one to two minutes, stirring constantly with a wooden spoon or spatula. As you stir, scrape up all those browned bits from the bottom of the pan – this technique is called deglazing, and it incorporates all that concentrated flavor into your sauce. The garlic should become fragrant and just barely golden. Don’t let it brown too much or it will taste bitter.
At this point, you can return the pork chops to the skillet and spoon the garlic butter over them, or you can plate the chops and pour the garlic butter sauce over the top. Either way works beautifully. The butter coats the meat, adds richness, and the fresh garlic brings brightness that balances all the savory spices. Garnish with chopped fresh parsley for a pop of color and fresh flavor.
Honey Mustard Sauce Variation
If you want to take these pork chops to the next level, the honey mustard sauce is an incredible addition. After removing the seared pork chops from the skillet but before putting them in the oven, reduce the heat to medium-low. Add the minced garlic to the pan and cook for about thirty seconds until fragrant. Then add the honey, Dijon mustard, whole-grain mustard, apple cider vinegar, and a pinch of dried thyme. The combination of smooth Dijon and grainy whole-grain mustard creates beautiful texture and depth.
Stir the sauce constantly as it cooks, scraping up all those browned bits from searing the pork. The sauce will thin out at first as the honey melts, then begin to thicken as it reduces. This takes about two to three minutes. You want it thick enough to coat the back of a spoon but still pourable. Once thickened, return the pork chops to the skillet, spooning some sauce over each one. Then transfer the whole skillet to the oven to finish cooking. The sauce will caramelize slightly on the pork chops, creating an incredible sweet-savory glaze. When the chops are done, they’ll be beautifully coated in this sticky, flavorful sauce that’s absolutely addictive.
Resting and Serving
Resting the pork chops after cooking is not optional – it’s one of the most important steps. When meat cooks, the muscle fibers contract and push moisture toward the center. If you cut into the meat immediately, all those juices run out onto the plate instead of staying in the meat. Resting allows the fibers to relax and the juices to redistribute throughout the chop, ensuring every bite is moist and flavorful. Five minutes is the minimum; seven to eight minutes is even better if you can wait.
Tent the pork chops loosely with aluminum foil while they rest to keep them warm, but don’t wrap them tightly or you’ll steam the crust you worked so hard to create. The internal temperature will rise slightly during this time, which is why you removed them from the oven at 140-145°F. After resting, they’ll be at the perfect temperature. Serve the pork chops whole or slice them against the grain for a different presentation. Pour any accumulated juices from the resting plate back over the meat before serving.
These pork chops pair beautifully with classic steakhouse sides. Creamy mashed potatoes are almost mandatory – they’re perfect for soaking up that garlic butter or honey mustard sauce. Steamed green beans, roasted carrots, sautéed spinach, or grilled asparagus provide freshness and color. A crisp side salad with ranch or blue cheese dressing adds contrast. Warm dinner rolls or Texas Roadhouse-style sweet yeast rolls complete the meal. For a truly authentic experience, serve everything on warm plates.
Cooking Variations
While the classic version is phenomenal, you can adapt this recipe in several ways. For grilled pork chops, prepare the spice rub exactly as directed and season the chops. Preheat your grill to medium-high heat and oil the grates well. Grill the pork chops for four to five minutes per side, turning once, until they reach 145°F. Brush them with the garlic butter or honey mustard sauce during the last minute of cooking. The grill adds authentic smokiness that takes these over the top.
For boneless pork chops, the recipe works with some adjustments. Boneless chops cook faster, so reduce the oven time to eight to ten minutes. They also don’t have the bone to add flavor and moisture, so brine them first if you have time: dissolve a quarter cup of salt in four cups of water, submerge the chops for two hours, then pat dry and proceed with the recipe. To make this spicier, add cayenne pepper to the spice rub or use hot paprika instead of smoked. For a herb variation, add dried rosemary and sage to the spice blend for a more rustic flavor profile.
You can easily scale this recipe up or down. Use the same seasoning ratios and cooking method whether you’re making two chops or six. Just make sure not to crowd the pan during searing – work in batches if necessary, keeping finished chops warm in a low oven while you sear the rest. For a lower-carb option, skip the honey mustard sauce and stick with the simple garlic butter finish.
Make-Ahead and Storage
You can prepare components of this recipe ahead of time to make weeknight cooking easier. Mix the spice blend in larger quantities and store it in an airtight container in a cool, dark place for up to six months. This makes seasoning even faster next time. You can season the pork chops up to twenty-four hours in advance – just cover them tightly and refrigerate. Remove them from the fridge thirty minutes before cooking to bring them to room temperature.
Leftover pork chops store well in an airtight container in the refrigerator for up to three days. Reheat them gently to avoid drying them out. The best method is in a 325°F oven: place the chops in a baking dish, add a tablespoon of chicken broth or water, cover tightly with foil, and heat for ten to fifteen minutes until warmed through. You can also reheat in the microwave on fifty percent power in thirty-second intervals, but the crust won’t be as good. Leftover pork chops are delicious sliced and served cold in salads, on sandwiches, or with scrambled eggs for breakfast.
Common Mistakes to Avoid
The biggest mistake people make with pork chops is overcooking them. Pork is safe at 145°F with a slight pink center – don’t cook it to 160°F or 170°F like old guidelines suggested. Modern pork is much leaner and dries out quickly when overcooked. Always use a meat thermometer rather than guessing. Another common error is not drying the meat before seasoning and searing. Moisture on the surface prevents proper browning and creates steam instead of a crust. Take the extra minute to pat everything bone-dry.
Don’t use thin pork chops for this recipe – they cook too fast to develop good color and are nearly impossible to cook without drying out. Stick with at least one-inch thickness. Avoid moving the meat around while it’s searing. Let it sit undisturbed to develop that crust. Flipping multiple times or constantly checking prevents proper browning. Don’t skip the resting period. Cutting into the meat immediately ruins all your hard work by letting the juices escape.
Be careful with seasoning levels – while these chops can handle generous seasoning, too much salt will make them unpleasantly salty. Start with three-quarters teaspoon per chop and adjust to taste. Don’t burn the garlic in the finishing butter – it only needs one to two minutes and should be aromatic and barely golden, not brown. Burned garlic tastes acrid and bitter. Finally, remember that the skillet handle stays hot long after you remove it from the oven. Always use an oven mitt and put a towel over the handle as a visual reminder.
Frequently Asked Questions
Can I use boneless pork chops instead?
Yes, but bone-in chops are preferred because the bone adds flavor and helps keep the meat moist. If using boneless, reduce oven time to eight to ten minutes and consider brining them first for extra juiciness. Boneless chops also cook faster, so watch the temperature carefully.
What if my pork chops are thinner than one inch?
Reduce the oven time significantly – start checking at the six-minute mark. Thinner chops may not need any oven time at all and can be cooked entirely on the stovetop. Sear for three to four minutes per side until they reach 145°F.
Is pink pork safe to eat?
Absolutely yes. The USDA revised its guidelines in 2011, confirming that pork is safe at 145°F with a three-minute rest, which results in a slightly pink center. This is actually the ideal temperature for juicy, flavorful pork. Modern pork farming has virtually eliminated trichinosis, which was cooked away at much lower temperatures anyway.
Can I cook these entirely on the stovetop?
You can, but it’s trickier to get even cooking. After searing, reduce heat to medium-low, cover the pan, and cook for six to eight minutes, flipping once, until they reach 145°F. The oven method is more foolproof and produces more consistent results.
What’s the best way to reheat leftovers?
Reheat gently in a 325°F oven with a little liquid, covered with foil, for ten to fifteen minutes. This prevents drying out. You can also slice the cold pork and use it in other dishes rather than reheating whole chops.
Can I make these without an oven-safe skillet?
Yes. Sear the pork chops in a regular skillet, then transfer them to a baking dish to finish in the oven. You’ll lose some of the flavorful pan drippings this way, but it still works. Alternatively, finish cooking them entirely on the stovetop using the covered method.
Do I have to make the honey mustard sauce?
Not at all. The pork chops are delicious with just the simple garlic butter finish. The honey mustard sauce is a variation that adds extra flavor, but the classic version with garlic butter is traditional and equally amazing. Make whichever version sounds better to you.

Texas Roadhouse Pork Chop
Ingredients
Equipment
Method
- Remove pork chops from refrigerator 20-30 minutes before cooking. Preheat oven to 400°F (200°C).
- Pat pork chops completely dry with paper towels. In a small bowl, combine garlic powder, onion powder, smoked paprika, dried thyme, black pepper, and salt.
- Season both sides of the pork chops generously with the spice mixture, pressing it into the meat. Let sit for 10 minutes while you heat the skillet.
- Heat a large oven-safe skillet (preferably cast iron) over medium-high heat until very hot. Add olive oil and swirl to coat.
- Place pork chops in the hot skillet and sear for 2-3 minutes without moving them, until deeply golden brown. Flip and sear the second side for 2-3 minutes until equally browned.
- Transfer the skillet directly to the preheated oven. Bake for 10-12 minutes, or until internal temperature reaches 140-145°F on a meat thermometer inserted into the thickest part away from the bone.
- Remove skillet from oven (handle will be very hot!). Transfer pork chops to a plate, tent loosely with foil, and let rest for 5-7 minutes.
- Return skillet to stovetop over medium heat. Add butter and let melt. Add minced garlic and cook for 1-2 minutes, stirring constantly and scraping up browned bits, until garlic is fragrant and barely golden.
- Pour garlic butter over rested pork chops and garnish with chopped fresh parsley. Serve immediately.
- For Honey Mustard Sauce: After searing, remove chops from skillet. Reduce heat to medium-low, add garlic, honey, both mustards, vinegar, and thyme. Cook stirring constantly 2-3 minutes until thickened. Return chops to pan, coat with sauce, then transfer to oven to finish cooking.