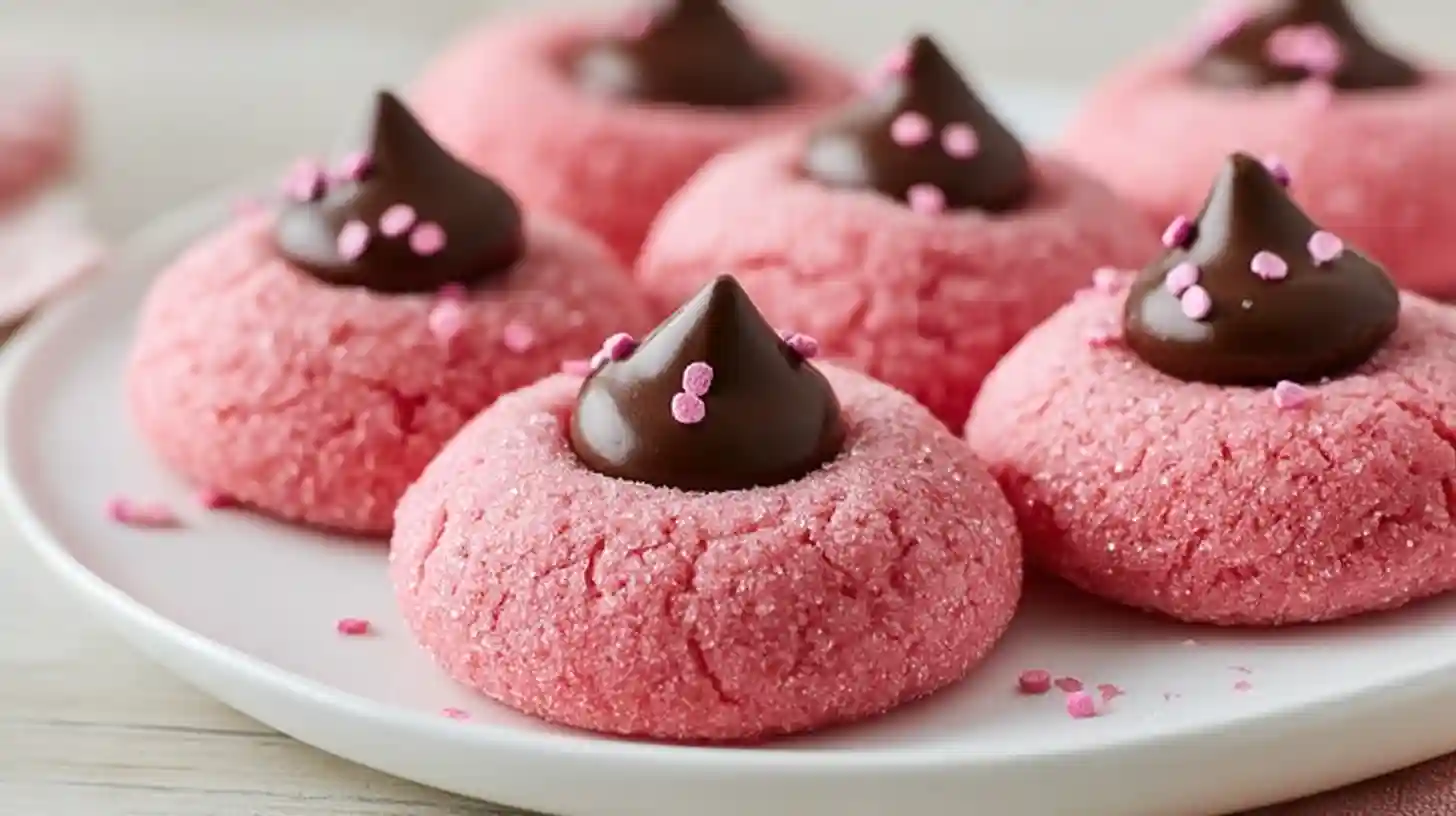
Last Valentine’s season, I wanted cookies that looked as sweet as they tasted without requiring hours of decorating. These Strawberry Kiss Cookies became my answer—soft pink sugar cookies with chocolate centers that look like they came from a bakery but require minimal effort. The combination of strawberry and chocolate creates that classic flavor pairing everyone loves.
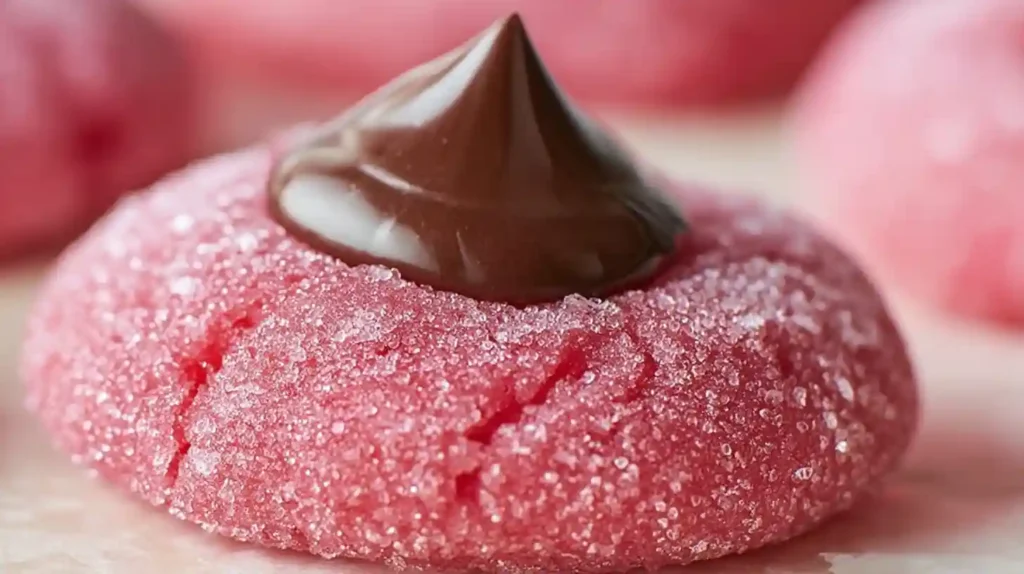
Strawberry Kiss Cookies feature tender, buttery dough infused with real strawberry flavor and topped with chocolate Hershey’s Kisses. The strawberry gelatin or freeze-dried strawberries provide both flavor and beautiful pink color without artificial dyes. Pressing the chocolate Kiss into warm cookies creates a slight depression that showcases the chocolate while the heat gently softens the candy.
This recipe works wonderfully for Valentine’s Day parties, cookie exchanges, or gifting to loved ones. The pink color and heart-shaped Kisses make them naturally romantic, while the straightforward method ensures success even for novice bakers. Each cookie delivers satisfying texture and balanced sweetness that appeals to all ages.
Why This Recipe Works
Strawberry gelatin powder adds concentrated flavor and vibrant color without excess moisture. The powdered form distributes evenly throughout the dough, creating consistent strawberry taste in every bite. Gelatin’s sugar content also contributes to cookie structure while enhancing browning for golden edges.
Creaming butter and sugar thoroughly incorporates air that creates light, tender texture. The mechanical action breaks sugar crystals against butter fat, forming tiny air pockets that expand during baking. Proper creaming takes three to four minutes—the mixture should look pale yellow and feel fluffy.
Pressing Kisses into hot cookies allows the chocolate to soften slightly and adhere properly. The warm cookie cradles the candy while residual heat melts the Kiss base just enough to create secure attachment. Waiting until after baking prevents the chocolate from melting completely and losing its distinctive shape.
Essential Ingredients
Quality ingredients create superior cookies. Fresh butter and real strawberry flavor make noticeable differences compared to shortcuts.
- 1 cup (226g) unsalted butter, softened to room temperature
- 1 cup (200g) granulated sugar
- 1 large egg, room temperature
- 1 teaspoon vanilla extract
- ½ teaspoon almond extract (optional)
- 2 cups + 2 tablespoons (280g) all-purpose flour
- 1 teaspoon baking powder
- ¼ teaspoon salt
- 1 package (3 oz) strawberry-flavored gelatin mix
- 24-30 Hershey’s Kisses, unwrapped
- ¼ cup powdered sugar for dusting (optional)
- Pink sanding sugar for rolling (optional)
Unsalted butter gives complete control over salt levels and tastes fresher than salted butter. Butter should feel soft when pressed but still hold its shape—not melted or greasy. Remove from the refrigerator sixty to ninety minutes before baking for perfect consistency.
Strawberry gelatin (like Jell-O brand) provides the signature pink color and fruity flavor. Any brand works, but avoid sugar-free versions which contain artificial sweeteners that affect texture. The three-ounce package size is standard—using the entire box ensures bold strawberry taste.
Almond extract enhances the strawberry flavor with subtle nutty undertones. The combination mimics the complexity of fresh strawberries better than strawberry flavor alone. Use sparingly—too much tastes artificial rather than complementary.
Hershey’s Kisses come in multiple flavors including classic milk chocolate, dark chocolate, and strawberry ice cream cone variety. Strawberry-flavored Kisses amplify the strawberry theme beautifully. Mix flavors for variety or stick with one type for uniform appearance.
Making the Cookie Dough
Beat softened butter and granulated sugar together in a large bowl using an electric mixer on medium-high speed. Continue beating for three to four minutes until the mixture turns pale yellow and feels light and fluffy. Scrape down the bowl sides halfway through to ensure even incorporation.
Add the egg and vanilla extract (plus almond extract if using) to the butter mixture. Beat on medium speed until completely combined with no streaks of egg visible. The mixture may look slightly curdled initially but comes together with continued mixing.
Whisk together flour, baking powder, salt, and strawberry gelatin powder in a separate bowl. This dry blending distributes the leavening and flavoring evenly throughout the flour. Breaking up any gelatin clumps prevents concentrated flavor pockets in finished cookies.
Add the dry ingredients to the wet ingredients in two additions, mixing on low speed just until flour disappears after each addition. Overmixing develops gluten that creates tough, dense cookies. The dough should look slightly rough rather than smooth when properly mixed.
Shaping and Baking
Preheat your oven to 350°F (175°C) and line baking sheets with parchment paper. Using parchment prevents sticking and promotes even browning. Position oven racks in the upper and lower thirds for batch baking or use the center rack for single sheets.
Scoop dough using a cookie scoop or tablespoon measure, forming balls roughly one inch in diameter. Roll each portion between your palms to create smooth, round balls. Uniform size ensures even baking—all cookies finish at the same time.
Place dough balls on prepared baking sheets spacing them two inches apart. Press your thumb or the back of a teaspoon into the center of each ball, creating a depression about half an inch deep. Twist slightly while pressing to create smooth, rounded indentations that won’t collapse during baking.
Bake for ten to twelve minutes until edges look set and lightly golden while centers remain soft. Cookies continue cooking on the hot pan after removal, so slight underbaking prevents dry, hard cookies. The surfaces should look matte rather than glossy when done.
Remove cookies from the oven and immediately press an unwrapped Hershey’s Kiss firmly into the center of each cookie. The warm cookie softens the chocolate base slightly, securing it in place. Work quickly before cookies cool and harden.
Cake Mix Shortcut Version
For ultra-simple cookies, use a boxed strawberry cake mix as the base. Combine one fifteen-ounce box strawberry cake mix with one egg and six tablespoons softened butter. Mix until dough forms, adding one tablespoon milk if the mixture seems too dry.
Shape into balls and bake at 350°F for eight to ten minutes. The cake mix already contains leavening, sugar, and flavoring, making this the fastest possible version. Press Kisses into warm cookies immediately after baking.
Roll dough balls in pink sanding sugar before baking for sparkly, festive appearance. The sugar creates a crunchy exterior that contrasts nicely with the soft cookie interior. This technique works beautifully for both cake mix and from-scratch versions.
Cake mix cookies spread more than from-scratch versions due to different fat and flour ratios. Space them three inches apart on baking sheets and expect flatter, crispier edges. Both versions taste delicious but offer different textures.
Freeze-Dried Strawberry Variation
Grind one ounce of freeze-dried strawberries into fine powder using a food processor or spice grinder. The powder provides intense natural strawberry flavor and beautiful pink color without artificial ingredients. Process until no large pieces remain for best results.
Mix the strawberry powder with granulated sugar before creaming with butter. This distributes the strawberry evenly and prevents clumping. Use the same base recipe, adding the strawberry sugar mixture in place of plain sugar and omitting the gelatin.
Freeze-dried strawberry cookies taste more authentically fruity than gelatin versions. The natural fruit provides subtle tartness that balances sweetness beautifully. Trader Joe’s and Whole Foods sell freeze-dried strawberries, or order online for convenience.
Expect slightly speckled appearance from strawberry seeds and fruit pieces. This natural look appears rustic and homemade rather than artificially perfect. The flavor payoff makes any visual imperfection worthwhile.
Decorating Ideas
Dust cooled cookies lightly with powdered sugar using a fine-mesh sieve. The white powder creates beautiful contrast against pink cookies while adding delicate sweetness. Dust just before serving since powdered sugar absorbs moisture and disappears over time.
Drizzle melted white chocolate over cooled cookies in zigzag patterns. Transfer two ounces melted white chocolate to a piping bag or zip-top bag with a tiny corner snipped off. The white drizzle looks elegant and adds extra sweetness.
Roll dough balls in colored sanding sugar before making thumbprints. Pink, red, or white sanding sugar adds sparkle and festive appearance. Press the sugar-coated dough slightly to help crystals adhere before creating the indentation.
Use different Kiss flavors to create variety. Arrange cookies with milk chocolate, dark chocolate, and strawberry Kisses on the same platter for visual interest. The mixed flavors let people choose their preferred chocolate type.
Storage and Make-Ahead Tips
Store baked cookies in an airtight container at room temperature for up to five days. Layer cookies between sheets of parchment paper to prevent Kisses from sticking to other cookies. Keep the container away from heat sources that could melt the chocolate.
Freeze unbaked dough balls for up to three months in freezer-safe containers or bags. Arrange balls on a baking sheet and freeze until solid before transferring to storage bags. Bake directly from frozen, adding one to two extra minutes to the baking time.
Prepare dough up to three days ahead and refrigerate in an airtight container. Cold dough actually scoops and shapes more easily than room-temperature dough. Let it sit at room temperature for ten minutes if it becomes too firm to work with comfortably.
Freeze baked cookies without Kisses for up to two months. Thaw completely, warm briefly in a 300°F oven for three minutes, then press fresh Kisses into the centers. This method produces cookies that taste freshly baked rather than frozen.
Troubleshooting Common Issues
Cookies that spread too much contain too much butter or weren’t chilled adequately. Refrigerate shaped dough balls for thirty minutes before baking to help them maintain their shape. Also verify your butter was softened but not melted when mixing.
Pale cookies that lack golden edges need higher oven temperature or longer baking time. Oven thermometers reveal actual temperature versus dial setting. Many home ovens run twenty-five degrees cooler than indicated, requiring adjustment.
Dry, crumbly cookies contain too much flour or were overbaked. Measure flour by spooning into measuring cups and leveling off rather than scooping directly from the bag. Scooping compacts flour and adds too much.
Kisses that fall out weren’t pressed firmly enough into warm cookies. Press each Kiss immediately after removing the pan from the oven while cookies remain very hot. The Kiss should sink slightly into the cookie and feel secure.
Serving Suggestions
Arrange Strawberry Kiss Cookies on a tiered dessert stand for Valentine’s Day parties. Mix them with other pink and red treats like cupcakes and macarons for cohesive color scheme. The varied heights create visual interest that flat platters cannot achieve.
Package cookies in clear cellophane bags tied with red or pink ribbon for Valentine’s gifts. Include two to four cookies per bag depending on size. The clear packaging showcases the pretty pink color and chocolate Kisses beautifully.
Serve cookies alongside strawberry milkshakes or pink lemonade for coordinated refreshments. The strawberry-on-strawberry theme works wonderfully for birthday parties or baby showers. Add fresh strawberries as garnish for complete presentation.
Create cookie sandwiches by spreading strawberry buttercream between two cookies before adding the Kiss. This decadent variation transforms simple cookies into impressive desserts suitable for special occasions. Press gently to avoid squishing the filling out the sides.
Perfect Occasions for Strawberry Kiss Cookies
Valentine’s Day represents the obvious occasion for these pink cookies with chocolate centers. The heart-shaped Kisses and romantic color make them perfect for class parties, office celebrations, or date night desserts. Bake a double batch since they disappear quickly.
Baby showers and gender reveal parties benefit from the soft pink color. These cookies work especially well for girl-themed celebrations. Stack them on vintage cake stands or arrange around the dessert table for cohesive decoration.
Bridal showers and bachelorette parties embrace the feminine aesthetic. Package individual cookies in small boxes as party favors guests can take home. Add personalized tags with the bride’s name and wedding date for memorable keepsakes.
Christmas cookie exchanges welcome colorful variety beyond traditional gingerbread and sugar cookies. These pink treats stand out on cookie trays filled with brown and white desserts. Swap strawberry gelatin for raspberry for deeper color if preferred.
FAQ
Can I use salted butter instead of unsalted?
Yes, but reduce the added salt to just a pinch. Salted butter varies in salt content between brands, making sweetness levels unpredictable. Unsalted butter provides better control over final flavor balance.
What if I can’t find strawberry gelatin?
Substitute with one ounce of freeze-dried strawberries ground into powder. Alternatively, use raspberry or cherry gelatin for similar pink color with different fruit flavor. Avoid lime or orange gelatin which would create strange color combinations.
Can I make these without the thumbprint?
Yes, bake as regular round cookies and press Kisses into the flat tops while warm. The cookies work equally well without indentations. The thumbprint simply creates a decorative nest for the chocolate Kiss.
Why did my pink color turn out pale?
Use the entire three-ounce gelatin package rather than measuring out portions. Baking also lightens colors slightly. For more vibrant pink, add one or two drops of red gel food coloring to the dough along with the gelatin.
Can kids help make these cookies?
Absolutely! Children can help cream butter and sugar, roll dough balls, make thumbprints, and press in Kisses. Supervise the oven work. The simple process makes this an excellent family baking project.
What other toppings work besides Kisses?
Try chocolate chips, M&Ms, Rolos, or mini peanut butter cups. Jam or fruit preserves also work beautifully in the thumbprint for completely different flavor profiles. White chocolate chips create elegant contrast against pink cookies.
How do I prevent Kisses from melting completely?
Press Kisses immediately after removing cookies from the oven, not while still baking. The residual heat softens the base without melting the entire candy. Let cookies cool completely before moving them so Kisses can re-harden properly.
Strawberry Kiss Cookies
Ingredients
Equipment
Method
- Preheat oven: Preheat oven to 350°F (175°C). Line baking sheets with parchment paper.
- Cream butter and sugar: In large bowl, beat softened butter and granulated sugar together using electric mixer on medium-high speed for 3-4 minutes until pale yellow and fluffy. Scrape down bowl sides halfway through.
- Add egg and extracts: Add egg, vanilla extract, and almond extract (if using) to butter mixture. Beat on medium speed until completely combined with no streaks.
- Mix dry ingredients: In separate bowl, whisk together flour, baking powder, salt, and entire package of strawberry gelatin powder until evenly distributed.
- Combine wet and dry: Add dry ingredients to wet ingredients in two additions, mixing on low speed just until flour disappears after each addition. Do not overmix. Dough should look slightly rough.
- Shape cookies: Scoop dough using cookie scoop or tablespoon (about 1 tablespoon each). Roll each portion between palms into smooth balls.
- Create thumbprints: Place dough balls on prepared baking sheets, spacing 2 inches apart. Press thumb or back of teaspoon into center of each ball, creating depression about ½ inch deep. Twist slightly for smooth indentation.
- Optional sugar coating: If using sanding sugar, roll dough balls in sugar before placing on sheets and making thumbprints.
- Bake: Bake for 10-12 minutes until edges are set and lightly golden while centers remain soft. Cookies should look matte, not glossy.
- Add Kisses: Remove from oven and immediately press one unwrapped Hershey’s Kiss firmly into center of each warm cookie. Work quickly before cookies cool.
- Cool: Let cookies cool on baking sheet for 5 minutes, then transfer to wire rack to cool completely. Dust with powdered sugar if desired before serving.
Notes
- Butter temperature: Butter should be soft when pressed but still hold its shape. Remove from fridge 60-90 minutes before baking.
- Don’t overmix: Mix just until flour disappears to avoid tough cookies. Dough should look slightly rough, not smooth.
- Gelatin brand: Use standard Jell-O brand or similar. Avoid sugar-free versions which affect texture.
- Kiss varieties: Try milk chocolate, dark chocolate, or strawberry ice cream cone flavored Kisses. Mix flavors for variety.
- Storage: Store in airtight container at room temperature up to 5 days, layering with parchment between cookies.
- Freezing: Freeze unbaked dough balls up to 3 months. Bake from frozen, adding 1-2 minutes to baking time.
- Make ahead: Prepare dough up to 3 days ahead and refrigerate. Let sit 10 minutes at room temperature before shaping if too firm.
- Freeze-dried option: Substitute gelatin with 1 oz freeze-dried strawberries ground to powder mixed with the sugar.
- Cake mix shortcut: Use 1 box strawberry cake mix + 1 egg + 6 Tbsp butter for ultra-simple version (bake 8-10 minutes).